Google has become an integral part of our lives. Whether we are checking in at a hotel, booking a ride, waiting in line or casually strolling the park, Google allows us to search up everything that we want to learn using its incredible Search Engine.
However, when you use Google sites to search up information, may it be an app or other Google service, it automatically stores some of your information in its Google Account. This information is commonly stored to deliver you more personalized experiences.
And if you’re not savvy with that, then still no frets. You can easily remove that information from your Google Account by following these few simple and easy steps. Here’s how you can remove stored information from your Google database in just a few simple and easy steps.
How to Delete Your Activity on Google Manually
Do you want to delete your Google activity permanently from Google’s database? You can either choose to wipe out all of the activity information at once or you can choose items individually.
If you want to delete all of your activity at once, all you have to do is follow these simple steps.
On the top, left navigation panel, click Data & personalization.
Under “Activity and timeline,” click My Activity.
Find the item you want to delete. You can find an item a few different ways, including:
Browse by topic or product. At the top, under “Delete by topic or product,” click Try it.
Search by keyword or date.
On the item, you want to delete, click More.
Click Delete.
Delete Your Activity from other Places
Whatever tasks you perform using your Google Account, it is not necessary that it only has to stay in your My Activity folder. For instance, if your Location History is turned on, your movement information gets stored in your Maps Timeline. You can easily delete all that information saved in those places.
And that’s all folks! Guess y’all know how to clear your activity information from Google’s database.
However, what you may fail to realize is that you can upgrade your subscription up to three years of Xbox Live gold subscription plan for $1.
Here’s what Microsoft has announced on its official announcement page,
New members and existing Xbox Live Gold and Xbox Game Pass for Console members can join or upgrade today and get their first month for just $1. Additionally, if you’re a current Xbox Live Gold or Xbox Game Pass member, and have prepaid months on your account, you’ll get Xbox Game Pass Ultimate credit for those months when you upgrade.
“As an Insider benefit, when you join Xbox Game Pass Ultimate to give feedback, we will apply any prepaid time you have on Xbox Live Gold, Xbox Game Pass or both toward Xbox Game Pass Ultimate, up to a maximum of 36-months.”
Source: news.xbox.com
It is a dream come true for all those who have the Xbox Live Gold subscription. If you have an existing Gold subscription on the Xbox Live, you can easily convert that into a Game Pass Ultimate when you apply for the Xbox Game Pass Ultimate 1-month for $1 deal on the Microsoft account.
The Benefits of Getting an Xbox Ultimate Pass
Here’s what you are going to get when you will activate your Xbox Ultimate Pass.
You will get instant access to a 100 games on Xbox one.
The PC version of the Game Pass which is in the beta.
Access any title of the Xbox Game on the day of its release.
Access to Gold titles on Xbox which means more free games.
Complete online multiplayer support for Xbox Players.
How to Avail this Amazing Deal!
This online method of securing a deal was first identified Slickdeals thread.
Since the time, the trick has been revealed people have started using this deal and as a result, and many of them have easily landed with 404 errors.
So if you are all up for doing this practice until you get it right, here it is:
Go to the “services and subscriptions” tab at the top of the page — this will show what you currently subscribed to (or not).
Before applying the 1-month-for-$1 deal to your account, extend your Xbox Live Gold subscription by buying additional months.
You can get 12 months of Live Gold for $60, although there are a few Live Gold deals out there that can bring the cost down to less than $50 for 12 months (CD Keys, Rakuten and Costco). Some people also have Microsoft Rewards they can convert into months of Live Gold. (Get separate 6- or 12-month codes, but opt for the latter where possible.)
You’ll want to get to as close to June 17, 2022, as your Xbox Live Gold expiration date to maximize the deal.
So, yes: You’ve now spent as much as $180 for 3 years of Xbox Live Gold ($60 x 3). But, you would’ve presumably spent that anyway.
You can get an extra month of Xbox Live Gold when you turn on auto-renew (recurring billing) when adding months to your account. You should be given the option after inputting a purchased digital code for 12 months of Gold, for example.
In your account settings, check when your Xbox Live Gold subscription is due to expire. Again, that’s under the “Services and Subscriptions” tab.
Once that deal is applied to your account, your Xbox Live Gold subscription will be converted to Game Pass Ultimate — and Game Pass Ultimate should be available for the length of your Live Gold subscription. You won’t have to pay anything for up to 36 months.
After whatever date your Game Pass Ultimate is listed to expire, you’ll have to pay $14.99 a month to continue it.
You can opt not to auto-renew your Game Pass Ultimate subscription.
If you opt not to continue Game Pass Ultimate, you could go back to subscribing to only Xbox Live Gold.
This solution was initially presented by the official CNET network.
Even though, you may have spent a total of $180 and a buck up for this deal. However, based on the Xbox Live Gold costing almost $5 a month you can use the game pass ultimate which costs about $15. You can save up to $360.
Do You Have Any Questions?
I hope this article was an informative read. Do you have any questions? Well, what are you waiting for! Go ahead and ask, we are more than willing to interact with you.
Participate with us on the actively growing TechWireHub community on Facebook.
The Pokemon company has created some of the most amazing marvels in the land of anime; Venusaur, Charizard, Pikachu, Arbok, Nidoqueen, Meowth and Sandslash to name a few.
Above all, Pokemon comes with a sacred motto, “Gotta Catch Em All!”
Keeping this particular motto in mind, the Pokemon company earlier released a mixed reality game known as the Pokemon Go. The game enabled players to walk around the city and catch their favorite Pokemon characters in different locations. The game created quite a buzz all around the world.
Now, the CEO of the Pokemon Company, Tsunekazu Ishihara has introduced a fairly new concept.
Imagine if your sleep time can turn into a complete entertainment?
Announcement 3⃣
What if you could continue training your Pokémon…even in your sleep? 💤
In 2016, Pokémon GO turned the simple act of walking into entertainment, making the entire world into a game. We’re about to do it again, Trainers—this time, for sleeping.
“Pokemon Sleep aims to turn sleeping into entertainment by having a player’s time spent sleeping, and the time they wake up, effect the gameplay,”
The new app is currently in its development phase. Little is known about the app, but from what we have heard, the app will track the player’s sleeping pattern and then use that collected information to deliver a remarkable gameplay experience to its users. It will collect data based on how long the user slept, and at what time they will wake up to play the game. Then, Pokemon Sleep will adjust the gameplay accordingly to deliver just the right gaming experience that a user was seeking.
Right after Nintendo observed an amazing success of its Pokemon Go app in the year 2016, Tsunekazu came forward with the idea of capitalizing its budget towards improving the gaming experience for its users. At one of the Tokyo conferences, he revealed that the app will focus on improving an individual’s sleep cycle and then enable them to lead a healthier lifestyle then they are already living.
“Fun Fact: Do you know that there are 340 million units of various Pokemon games sold since 1996?”
In conjunction with the Pokemon Sleep app, a new device called the Pokemon Go Plus Plus will also get launched. This peripheral device will track and monitor your sleep patterns and is set to release in 2020.
It is just a matter of time until the game launches. Pokémon fans are incredibly fascinated and are dearly waiting for the massive launch. With the New Pokemon Sleep app, they will be able to train their Pokemon even when they are fast asleep.
Do You Have Any Questions?
I hope this article was an informative read. Do you have any questions? Well, what are you waiting for! Go ahead and shoot, we are more than willing to interact with you.
Participate with us on the actively growing TechWireHub community on Facebook.
Who likes Ads? If you ask me it’s the last thing I want to see when I am watching a stream.
They say ads are a great source of earning for businesses. However, truth be told, they aren’t. Most ads are for baby boomers. Take a look at Facebook, the only social platform baby boomers use.
Many people have claimed on Reddit that they have stopped watching videos on social media platforms just because of these ads appearing everywhere in every video that they watch online.
Twitch is one of the largest online game streaming app which is massively used by online players from around the world. It helps educate individuals on how to play various games of their likings.
Not only is it a great platform for online gaming, but players streaming on Twitch are able to create a loyal fan following by offering free giveaways and amazing discount offers. They say advertising is an interesting way for streamers to earn. Actually, streamers have no particular control for ads on Twitch.
Streamers Do Not Own the Right to Decide What is Shown on Twitch
When it comes to Twitch, streamers have no control over what is shown to the consumers on their streaming channels. Previously, it could’ve been anything; from crappy game ads to movies to political candidates asking users to vote for them. It got out of hands and a real annoyance for daily viewers.
Things really turned an odd way for Twitch streamers when they started seeing ads for on-site events and other Twitch creators on the platform. The official team got some serious backlash for this.
As a result, during the month of January, Twitch released an announcement stating that they will no longer run advertisements promoting on-site events or other streamers across the platform.
Despite all the widespread criticism faced by the streamers who were part of the advertising campaign, some of them came out and expressed how such campaigns benefit the whole industry.
Here is Pokimane, one of the streamers expressing her happiness on the exposure brought by the ad.
However, at the same time, many creators feared that such advertising campaigns powered by Twitch can really draw the viewers away from their channels. Here’s what Sam “Strippin” Thorne has to say:
I thought people were pretty vocal recently about their displeasure of other broadcasters being advertised on their channels so why the fuck are my viewers seeing Pokimane ads @Twitch
That sounds a bit harsh but what incentive do streamers have to run ads when Twitch tells their audience to go watch someone else?
Also, Streamers Make Almost Nothing with Ads
Now, I am not speaking my mind out here, but while I was doing my research, I came to this website called the PoopButt101. I learned that most Twitch streamers almost make too little by running ads.
Here is a snippet from the user’s Live Views for the month of February.
As you can see, the user easily falls into the 10k category.
Here is how much the user is earning through running different campaigns on the Twitch.
Do you see how less the user makes from running ads on his Twitch channel? Only $7.12. That’s a relatively bad bargain a user has got himself into, because every time a visitor visits, he/she is forced to watch an ad worth 30 seconds. Surprisingly, an average individual takes only 5 seconds to switch.
Another great way how Twitch users make a good viewership is by asking people for donations. The more the people donate, the more they are able to contribute to a cause and do something amazing.
Now when someone visits a streaming video where you are asking for let’s say, a $5 donation. The first thing that comes to their mind is, “Oh, this guy is already earning money from running ads.”
In fact, streamers nowadays earn through donations and ads are simply discouraging that option.
How Should One Remove Twitch Ads Permanently?
We have now concluded that Ads can be a real nuisance for both, the viewers as well as streamers.
Previously, people were considering good ad blockers to stop ads from trashing their experience. But, recently, Twitch has worked up its algorithm which can easily evade the bypasses of ad blockers.
It is using the circumvention software to subvert ad blockers.
If you want to stop ads from appearing in your Twitch videos, here’s what y’all need to do.
Method # 1
If you are using Google Chrome as a browser, make sure to visit chrome://flags/#network-service and then disable it. This will stop ads from appearing on your Twitch stream constantly troubling you.
Method # 2
Another way to avoid ads from appearing on your Twitch channel is to switch your Twitch desktop version to a mobile version. You can add an extension called the User-Agent switcher to the browser.
You can easily find the extension for this app on your browser extension store.
If the official website doesn’t work, activate the browsec extension for a private IP address in Chrome.
Also, make sure to add ublock origin or umatrix extensions to your browser for ad blocking.
Do You Have Any Questions?
I hope this article was an informative read. Do you have any questions? Well, what are you waiting for! Go ahead and ask, we are more than willing to interact with you.
Participate with us on the actively growing TechWireHub community on Facebook.
Do you own a MAC machine? Then you do know that it works in an entirely different way than a normal system powered by Windows. Every feature of the MAC OS X makes it a brand apart.
If there is one thing that Macintosh has made superbly easy to capture, they are screenshots.
By the way, have you noticed that there is no Print Screen button on your Macintosh keyboard?
Don’t worry! You can still take screenshots and that too from your Macintosh keyboard.
Here are some interesting ways to take screenshots on your Macintosh.
Press “Shift” + “3” + “Command”
You can take a quick screenshot of your screen by pressing ⌘ + Shift + 3
This method will allow you to take the screenshot of the whole screen. Once you screenshot it, it will automatically be saved on your Mac clipboard. Now choose where ever you wish to add the screenshot and simply paste it using the “Command” + “V.” It will paste the entire screen in location.
Press “Shift” + “4” + “Command”
You can take a quick screenshot of a portion of the screen by pressing, ⌘ + Shift + 4
This method will allow you to take the screenshot of a part of the screen. It will automatically change your pointer into a cross-hair. You can then drag and snip an area of a screen and capture it.
Once, you release the mouse button, the screenshot will automatically get saved as a PNG image.
While dragging, you can hold the “Shift,” “Option,” or “Spacebar,” to change the way selection works.
A Few Pre-Requisites to Keep in Mind Before Taking Screenshots
These shortcuts will work across all Apple operating system versions including Leopard, Snow Leopard, Lion, Mountain Lion, Mavericks, Yosemite, El Capitan, and macOS High Sierra.
A few applications will restrict you to take screenshots of their windows.
You can openscreenshots using any image-viewer of your choice.
If you want to save a screenshot in your site clipboard, press Shift + Command + Control + 3.
In case, Your Mac OS Screen Capture Does Not Work
There are several reasons why screen capturing can stop working on your Mac OS. It usually happens when the following option is simply disabled in the background.
If you want to fix the following issue, then simply follow these five easy steps:
Go to the System Preferences section from the Apple menu in the top left corner.
Open a new window and then click on the Shortcuts option.
Now, find Screenshotoption within the left Apple Menu.
Now, check if the shortcuts are active and have the same key combos discussed above.
If they aren’t, then simply change them to the old ones or just learn the new combos.
How to Recover Lost Screenshots on Your MAC Device
Do you know that you can even recover your lost screenshots on MAC? The only condition of retrieval is that your MAC memory location where those screenshots were saved does not get overwritten.
If you want to recover your last screenshots, you should stop using your Mac system to avoid data overwrite. Instead, all you have to do is use a suitable file retrieval software and pull up information.
How your screenshots can get lost or deleted in several instances:
Format – Sometimes, screenshot data can get lost when a user accidentally format screenshots on MAC system by mistake. Formatting is usually done to avoid external threats harming the system.
Emptying Trash – Sometimes, when you empty the trash on your Macintosh device, your screenshot can end up getting deleted. If you haven’t cleared your trash, you can still easily retrieve it by restoring.
Other Reasons – Several other reasons such as file transfer failures, power outages, hard drive corruption, software malfunctions can contribute to the loss of screenshot data from Mac OS devices.
In case, if your Macintosh suffers from such vital threats of data loss, you can still easily retrieve that lost information using a retrieval tool. Disk Drill software is a great tool to help you.
It can help you retrieve all your valuable screenshot images, RAW images, photos, videos, audio files and other file formats from the MAC systems. It is a great tool to keep if you’re using a Macintosh.
Do You Have Any Questions?
I hope this article was an informative read. Do you have any questions?
Well, what are you waiting for! Go ahead and ask!
Participate with us on the official TechWireHub Group on Facebook.
Android enabled smartphones can help an average individual perform and achieve many important tasks on a daily basis. There is a common misconception that Android phones are majorly used for playing games or accessing social media accounts. However, this is far from the truth. Mobile apps can help you achieve a great number of tasks, including keeping you healthy and fit.
We have GPS enabled watches, and we have smart phone devices with ultra-sensitive sensors.
As a health conscious individual, I am always looking for ways to track how many steps I covered in a day or how many calories I shed off after performing cardio exercises. And nothing serves the purpose best than a clean coded and highly functional Android running app.
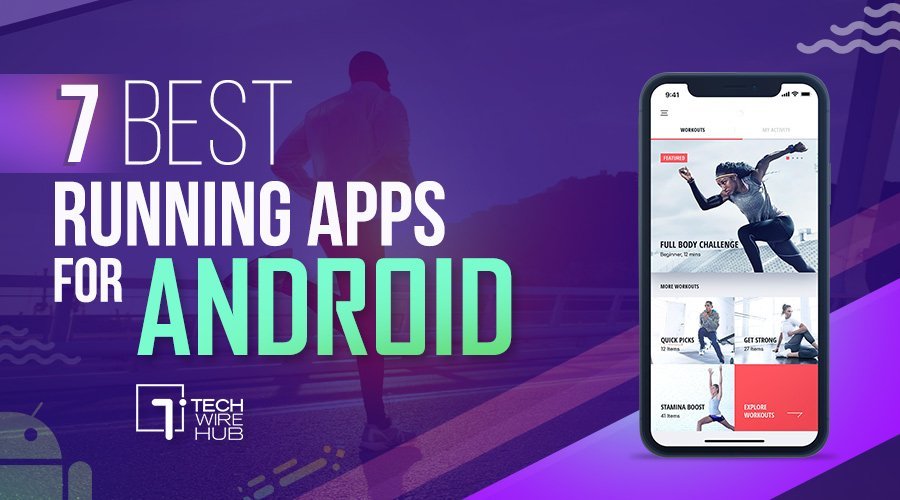
However, with the plethora of Android apps sprawled across the Play Store, you are often confused which one to stick to. Here are 8 powerful running apps that can help you plan, measure, track and record your fitness performance in the blink of an eye.
RunKeeper
Looking for an app that does not entail any GPS installed exorbitantly-expensive wearable to track your routine? Look no further than the RunKeeper. This app leverages your smart phone sensors to provide you with accurate information! RunKeeper is a great app which provides basic stats such as how much calories an athlete has burned or how much time the athlete has spent exercising, or at what pace the runner was running or how much distance they covered covered? In addition to running, the app tracks other exercise activities as well, including cycling, hiking or any other distance covering activities.
It comes in two packages; the free version and the premium version. Check it out.
Nike Run Club
Nike Run Club, most commonly known as NRC, is an intelligent app that comes with a voice guided feature. You can now have voice guided running sessions to help you keep track of your performance without having to keep your eyes glued to your phone. Nike Run Club is an excellent app for beginners who are learning to build momentum while jogging. With this app, you will never have to face any difficulty running ever again. You will fit into a routine and you can even connect with your friends.
Now, follow your friends and view their runs. Cheer them up on their achievements!
Google Fit
Want an app that allows you to set a particular fitness goal and then monitor it consistently? Then believe me, Google Fit is an incredible mobile app that allows you to track your fitness activities without any hassle. The app offers intuitive personalized recommendations and customizes coaching exercises. You can sync with your wearables and measure your health wellness. Among all this, it offers real-time statistics for pace, speed, elevation, routes and much more.
With Google Fit, you can now track your progress from anywhere, using any device, at anytime.
EndoMondo
EndoMondo is an app specifically designed for athletes who perform more than one fitness activities in their daily routines. It is a simple and easy-to-use app which allow users to track numerous fitness activities. Some of these activities include cycling, running, kayaking, mountain biking, squatting, etc. Since, the app has a separate feature for running, it can allow you to monitor your workouts and count your steps with the help of GPS.
With EndoMondo, you can now check stats and follow up on a routine basis.
Runtastic
Runtastic is one of the top three running apps on Android. The app focuses on various cardio exercises such as running, biking, and hiking. It has an easy-to-use interface and a strong mapping feature that offers accurate mapping information. The only downside of the app is that you will be able to view the map of your route only after you have completed your workout. Which brings it down to the third best Android app on the market. Also, the app does not contain any internal music player. So if you want to listen to music, you will have to run a separate app.
PumaTrac
Searching for a personal coach who can craft a customized workout plan for you? Look no further than PumaTrac. It is an amazing Android app that understands what you are missing out on and how to motivate you. The app is quite simple and lightweight. Pumatrac has some great advanced navigation capabilities. The app provides accurate information on how much distance you have covered and how much energy you have spent in running.
The best thing about Pumatrac is that you get a chance to play with world-class athletes.
Strava
Wildly popular among cyclists and runners, Strava is a great choice for casual runners and athletic pros alike. It offers in-depth GPS tracking, works with a variety of GPS devices, and tracks all kinds of metrics. It’s also known for its popular segments feature, which shows how you stack up against other runners on the same route. Premium users also get access to Beacon, a safety option that allows three designated contacts to monitor your location while you’re out running.
If you are looking for a great app with a GPS device to track your performance, Strava is your one-stop shop for all.
Do you have little ones at home? I am sure anyone sharing quarters with little spawns knows how difficult it is to keep our iPhone away from sticky hands and prying eyes. After-all, we can’t just hand them a working device. At least, not one which comes with a SIM card. It makes me cringe thinking of all the dangers lurking in the depths of technology!
Do you know there is a way you can use an iPhone without the SIM card?
In fact, you don’t even need a stable Wifi connection to run it.
To explain to you the complete process of activating your iPhone without a SIM card, we will assume that you already have access to an unlocked iPhone which is not carrier specific.
If you want to unlock an iPhone which is carrier specific, watch this amazing video instead:
Method # 1: Unlock Your iPhone Using Someone Else’s SIM Card
One of the easiest and quickest ways of unlocking your iPhone is to use someone else’s SIM card. For that, you will need a friend who already owns a smartphone and is interested in sharing the SIM with you. Once you have unlocked the phone, you can use it on a WiFi network just like you can use an iPod/iPad. Here are a few things that you require to remove the SIM card from your iPhone.
Get access to a SIM removal tool
Find a nice friend who is willing to share his SIM card with you
A steady access to a powerful Wifi Network.
Now, let’s get down to business. Here’s how you can unlock your iPhone using someone else’s SIM card.
Remove the SIM card from your friend’s phone and insert it into the iPhone device you wish to unlock.
Upon starting the device, go through the usual configuration steps and log-in.
Now patiently wait for the iPhone to activate, once its done, remove the SIM and hand it back.
Now, you can access all the features of the iPhone apart from sending a text messages or making a call.
Don’t worry, the SIM will work just fine on your friends phone while you can communicate using different social platforms such as Skype, Facebook Messenger, WhatsApp, etc.
Method # 2: Activate Your iPhone Using the iTunes Option
This particular method is specific for iPhones that are carrier specific and locked on a particular network. So, if you have such a phone in your possession, you can unlock this phone using the iTunes option. Even if you don’t have access to a stable Wifi, iTunes will work for you.
Here are the two prerequisites you will need:
An unlocked iPhone device
An accessible iTunes on computer
Here’s how you can unlock your iPhone using the iTunes method.
Download iTunes for free and then check if your iTune account is up to date.
Now connect your phone to your Computer & connect it to iTunes.
You will see an on-screen prompt, saying, “There is no SIM card installed in the iPhone you are attempting to activate.” It will indicate that the phone is locked on a specific carrier. Now, you have to find that specific carrier, but just for a moment to unlock your iPhone.
Once the prompt is resolved, your iTunes will guide you through a step by step process on how to activate your iPhone. Fill in all the important details and activate your phone.
Now, you can use your iPhone just like an iPod or an iPad.
Method # 3: JailBreak Your Phone
If every other method fails, you can make use of the jailbreak feature to unlock your iPhone. Once your device is jailbroken, the warranty of your phone becomes void. Jailbreaking an iPhone or an iPad requires you to go through an extremely long process to activate and unlock it.
We usually don’t recommend this method as it is unethical in practice. It can seriously damage the warranty and price of your phone and hence, this method is considered an unreliable one.
If you are interested to jailbreak your iPhone, here is an interesting video to guide you:
So here are all the methods you can employ to activate your iPhone if you don’t have a SIM card.
Do You Have Any Questions?
I hope this article was an informative read. Do you have any questions? Well, what are you waiting for! Go ahead and ask us questions, we are more than willing to interact with you.
Participate with us in the actively growing TechWireHub community on Facebook.
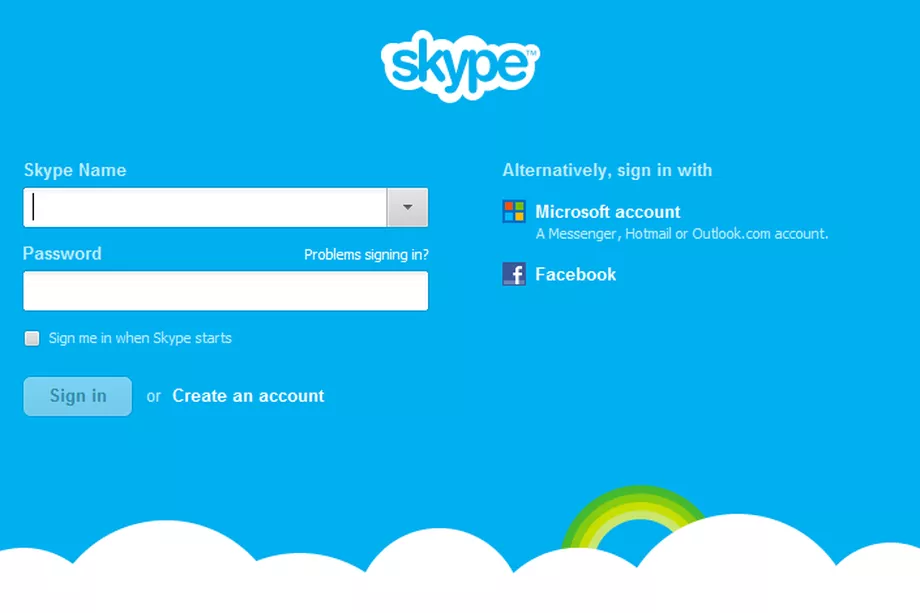
Who doesn’t like to get social? Specially when there are so many interesting social apps all around. Among many such social apps, Skype is the most convenient for commercial & domestic use.
After all, from colleagues to friends and family, Skype keeps us all connected. We send messages to each other, make fun video calls, share files, and above all, see all those who are online.
However, with all the beeps and boops, Skype can be a real nuisance at times. Often, we aren’t even aware of whether we are logged into the platform or not and suddenly we start receiving calls & messages at the most unwarranted occasions, for example in the midst of important business meetings.
Basically, this happens because by default, Skype logs a user in automatically every time their device powers on. The person then stays logged in the background until the device completely shuts down.
Skype is designed in such a way that it ensures your loved ones can always stay connected with you.
But that can seriously turn sour when you are busy!
Do you know that you can stop Skype from auto-starting on your Windows? So, today, I will explain you how you can disable Skype in Windows 10 right at startup. The next time your system boots, it will not auto-start Skype. Instead, you will have to manually open it by double-clicking the Skype icon.
Method # 1: Log-Out from Your Skype Account Once You Are Done Using It
The fastest and most reliable way to stop Skype from auto-starting is to log-out from your Skype account permanently. What is your end goal? I am sure you want people to stop annoying you on Skype.
All you have to do is log-out from your Skype account once when you are done using it.
So, the next time you boot your system, Skype will auto-start but it will eventually fail to sign in.
Here’s how you can log-out from the Skype app in Windows 10.
Step # 1: Click on the the three dots located on the upper left corner of the screen.
Step # 2: Choose the option that says “Sign Out”
Step # 3: Skype will automatically exit from the screen.
Normally, when you are using Skype and you are logged into the platform, there are two processes running in the background. You can check both of these processes working in the background in Task Manager. To access Task Manager, press CTRL + SHIFT + DEL and select Task Manager.
Both of these processes are SkypeHost.exe and SkypeApp.exe. So when you shutdown your Skype without logging out, SkypeHost.exe still keeps running in the background so you can still receive notifications from your Skype contacts. However, when you log out of Skype, both the processes gets killed. As a result, when you shutdown your Windows and restart your system, it doesn’t log you in.
Method # 2: Set Skype not to Automatically Start from the Settings
The other method isn’t complicated either and is an option that will permanently stop Skype from logging you back in on the Windows Start-Up. The step are as follows:
Step # 1: Double click the Skype icon and start the Skype Desktop app on your computer.
Step # 2: Click on the three dots located at the upper left corner of the screen.
Step # 3: Go to the Settings option.
Step # 4: In the Settings option, go to General settings.
Step # 5: Flip the switch “OFF” , Automatically start Skype once and for all.
By selecting this option, you will permanently stop Skype from auto-starting. If you follow the first method, even though you will stay logged out, Skype will still run in the background on Windows 10. However, with the second option in place, Skype will not even start in the first place. In fact, you will have to double click the Skype icon and manually start Skype in order to use it. However, don’t forget that you will still be logged in Even though you have shutdown the program permanently.
Did You Find this Article Interesting?
I hope this article was an informative read. Do you have any questions? Well, what are you waiting for! Go ahead and shoot away; we are more than willing to interact with you.
Participate with us in the actively growing TechWireHub community on Facebook.
The excitement has been brimming up among the fans for quite some time. The world has relentlessly waited for the official launch date and pricing reveals of the amazing two new Google phones; the latest Pixel 3a and the Pixel 3a XL, which Google had kept in the bag for far too long.
As much as the rumors are clouding the environment, our research has conjured some concrete and authentic reveals. And this massive reveal comes from no other platform than the Google’s very own.
A teaser was published earlier on the Google’s store page, stating that,
On May 7, something big is coming to the Pixel Universe.
The above statement itself is a clear indication that Google is about to release its amazing new phone models on the following date. Apparently, May 7 also marks the first day of the Google I/O conference.
It all started with Mr. Stephen Hill of 9to5Google, who sent out a tweet just before Google revealed its teaser. He pondered over some of his own predictions stating that Pixel 3a will be launched on May 7.
Another tidbit I shared on last week’s @abcscoop: Confidence score of ~7/10 on this but I’ve seen evidence Pixel 3a will hit Google Store in May 7th.
Although Google has not officially mentioned anything about its mid-range pixel phone pricings yet, a new leak indicates that the mid-range carrier phones will cost approximately around
$649.99 CAD ($489 U.S) for the Pixel 3a and $799.99 CAD ($601 U.S) for the Pixel 3a XL.
A Few More Highlights
Both smartphones, the Google Pixel 3a and the 3a XL, will be similar in looks to the Google Pixel 3. It is also expected that both the phones will come with 3.5 mm headphone jacks and will be equipped with a single lens camera, at the front and back. The phone is expected to have an 8 Megapixel wide angle front-camera and a 12 Megapixel back camera. Both the cameras are expected to perform effectively the same way as the Pixel 3’s did; however, we can’t be sure that they will be up to the mark.
Both the new phones will come in two basic colors, White and Black. However, a recent research conducted by WinFuture discloses that the Pixel 3a might add three more colours to the list.
According to 9to5 Google, the screen size for both the phones, (Pixel 3a & Pixel 3a XL) will be 5.6 inches and 6 inches respectively. It will further offer an OLED screen with resolution of 2220x1080p and 440 dpi. They are also expected to contain the Active Edge squeezable side and eSIM support.
The headsets will be powered by Qualcomm Snapdragon 670 along with 4 GB RAM.
However, just to be perfectly clear, Google has nowhere put the launch date at May 7, but it has definitely hinted at the Pixel Universe. Hence, connecting the dots, we have speculated the launch date.
So that’s just about everything we know about the Google Pixel’s 3a and 3a XL phones right now.
Let’s keep our finger crossed and see what massive reveals await us in the future.
Do You Have Any Questions?
I hope this article was an informative read. Do you have any questions? Well, what are you waiting for! Go ahead and ask us questions, we are more than willing to interact with you.
Participate with us in the actively growing TechWireHub community on Facebook.
For a new era that demands more, and a whole new generation that expects more, I am thrilled to introduce two new devices that deliver more, please say hello to the brand new Galaxy A-80 and Galaxy A-70.
These were the words addressed by none other but the Samsung’s President & the CEO, DJ Koh at the live event which took place on the 10th of April in Bangkok City, Thailand.
It left the entire Samsung audience mystified as they were expecting the much anticipated reveal of the Galaxy A40 and the Galaxy A90 models. Instead, they were greeted with completely different phone models of the A-series, the Galaxy A70 and the Galaxy A80.
The Presenter named Ruby at the Live Event said,
When we begin to design the Galaxy A-series, we had one goal in mind, to help these digital pioneers push the limits of Live Mobile Communication and give them access to the best of what they truly need in the era of Live.
Built for the future era of the Live, these phones are specifically designed to meet the modern day requirement of the ever-growing market of influencers. This time, Samsung has kicked things up a notch with its massive reveal of the Galaxy A80 and Galaxy A70.
It’s one of the first smartphones of its era which comes with a rotating camera mechanism.
Normally the camera’s on the back are more powerful than the front facing cameras, but with the new phone, you can easily flip the back camera to the front and have the same experience. All thanks to the rotating pop up camera which is available on both models.
The camera setup comprises of a 3D Depth module (specs unknown), an ultra-wide 8-megapixel f2.2 (128-degree) module and the primary 48-megapixel f.20 snapper. All you have to do is tap the lens flip button on the main screen and it flips the camera for you.
The camera of 48 MP + 8 MP on the Galaxy A80 beat hands down the camera of the Galaxy A70 which is 32MP + 8MP + 5MP. Both the phones have a 25W super fast charging.
The Galaxy A80 & Galaxy A70 series has a slightly bigger display than the Galaxy A50. But when it comes to RAM speed, Galaxy A80 stands above the Galaxy A70 with an 8GB RAM. The Galaxy A70 has 6GB RAM instead of an 8GB RAM. Both, A70 & A80 have 128GB storage space.
While, A50 and A70 contains microSD card slots, the A80 model does not support microSD cards. On the other hand, the Galaxy A70 has a bigger battery pack than the Galaxy A80 which has a battery pack of 3700mAh. The battery pack for Galaxy A70 is around 4500 mAH.
Ruby further illustrated,
It’s important to have a display which is spontaneous as your ideas are, as the first Galaxy device with the full-screen design, the A80 offers the perfect canvas for you to explore. No front facing camera notch. The New infinity display is a screen that is all screen.
It means that you can now watch just about anything you want without any distractions. With the new infinity display edge-to-edge, you can now enjoy every vibrant pixel of every image, every video and every story that you stream on your smartphone device.
The phone display is also optimized for multi-tasking. You can split screen and watch videos and at the same time respond back to your business queries through social apps of choice.
The full screen display might baffle the mind of an average user making him wonder where is the front facing camera? or how does my voice delivers through the microphone? or where is the speaker? It’s actually all there behind the screen. The mic is embedded below the screen. Now, while taking a call, you can hear your friend through the display and talk back to them. Both, Galaxy A70 and Galaxy A80 comes with an on-screen fingerprint support so only you can access the device. The onscreen fingerprint reader is fused to glass.
The image resolution of the Galaxy A80 (8000 x 6000) is better than the image resolution of the Galaxy A70 (6500 x 4920). The prices for both the phones are yet to be confirmed.
For now, all we know that both the phones, the A80 and the A70 model are releasing with aluminum frames encased in what Samsung terms as the 3D glass. They come in three sparkling finishes; the Phantom Black, Angel Gold and the Ghost White.
The phone is known to work epic from both the sides. You can now create Live focus videos with super steady support which creates videos as if you are watching a movie. Additional to the intelligent camera, it also comes with an intelligent battery saver support feature. The phone automatically adapts to your routine and adjust the battery settings for max. Use. It also comes with Intelligent Performance Enhancer which learns how you use the phone and predicts which apps you are going to use and optimizes its performance accordingly.
Without a doubt, the Samsung Galaxy A70 and the Galaxy A80 is one of the interesting eye-catching designs in the mid-range smartphone category.
Do You Have Any Questions?
I hope this article was an informative read. Do you have any questions? Well, what are you waiting for! Go ahead and ask us questions, we are more than willing to interact with you.
Participate with us in the actively growing TechWireHub community on Facebook.