Category Archive : How to

online sales

How to Increase Online Sales: 5 Effective Ways

Redefine the approach to advertising campaigns

Today, an entrepreneur has many paid tools for online promotion:

  • targeted advertising on social networks;
  • contextual media advertising in search engines and on websites: displaying advertisements that correspond to specific search queries of the user, his behavior or interests;
  • remarketing; partner integrations;
  • promotion through bloggers;
  • video advertising;
  • promo in mobile applications.
  • Create a Flyer and post on social media.

There are several factors that determine the effectiveness of an advertisement:

  • hype, creativity, dialogue with the target audience in a language that they understand;
  • listing the benefits that the consumer will receive;
  • constant testing of advertising results: without analyzing this data, it will not work to identify the message that gives the maximum conversion.
  • The advertising channel also matters. For example, leaflets advertising expensive electronics casually thrown into mailboxes in a residential area are unlikely to cause a wave of consumer interest in the store’s products.

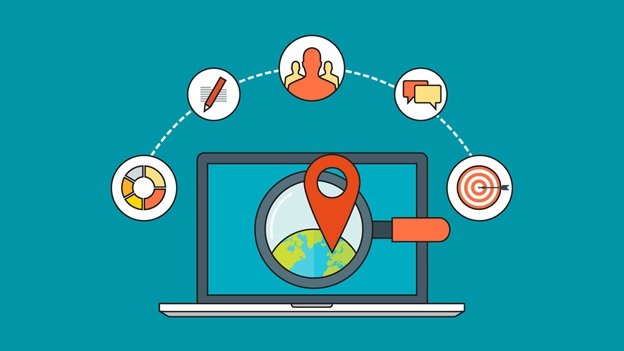
How to choose the right advertising channel

  • Determine the goal of promotion: for example, increase brand awareness, build a base of potential customers, stimulate repeat purchases, return customers who almost made an order.
  • Analyze already launched campaigns: look at the most effective promotion channels and the audience to which the advertisement was shown. Launch new campaigns based on this data.
  • Examine what competitors are choosing who are selling similar products in a similar area.
  • Choose 2-3 promotion channels at once in order to weed out non-working ones. Advertising channels are learned by comparison. At the same time, it is necessary to clearly define in advance the criteria by which the promotion options will be compared.
  • Test: not only advertising tools, but also the messages themselves, because even such nuances as the background color in the picture can influence the decision to purchase.

Work on your online reputation

Testimonials are a very important part of building a reputation and an effective sales management tool. After all, the number of purchases largely depends on the reputation. Reviews allow:

  • understand the real needs of customers and improve the quality of the product or service in accordance with the requests;
  • show your target audience that their opinion matters, and the brand listens to customers and appreciates them;
  • Improve search engine rankings by hiring an SEO company through natural brand mentions in consumer reviews;
  • provide additional advertising that does not need to be paid for, but which is highly appreciated by the audience.
  • According to statistics, 91% of people aged 18-34 have the same trust in online reviews that personal recommendations from their friends, acquaintances, relatives cause. 93% of users claim that they made a decision to buy a product thanks to a high-quality review on the Internet.

Therefore, a well-thought-out strategy for working with reviews will definitely be beneficial and help to increase sales in the online store.

How to get feedback

The easiest way to get feedback is to ask customers who have already bought something. They need to be told where they can evaluate the product, comment on its use. The effectiveness of collecting feedback depends on this.

You can convey your request in the following ways:

  • sending by email some time after purchase;
  • a pop-up window or block with a request to evaluate the service immediately after the client has made an order on the website / in the application;
  • Advertising on social networks – for example, in a group or company community;
  • phone calls to clients.

How to track reviews

If there are not so many mentions of your company on the Internet yet, you can use a manual search. To do this, you need to specify the search region and the time for which references are needed (hour, day, week, month). And then enter a query in the search bar, for example, “your store + reviews”. In social networks, you can also search for posts by keywords.

If you want to automate the process, you can use the free tools. For example, Google Alerts. In this service, you can set up alerts that will be sent to your email when new mentions of your brand appear on the network.

Another useful product for dealing with reviews is Babkee. This service even knows how to determine how high the authority of the author of the publication about you is and how the review will affect the reputation. In a separate article, you can learn more about services for monitoring brand mentions .

How to work with reviews

In addition to working out the algorithm for tracking reviews, you need to develop a strategy for responding to them.

The worst case scenario is no reaction. This will show your target audience that you are not interested in dialogue with the buyer. Typically, brand indifference causes negative reactions and markedly diminishes customer loyalty.

The best option is to create a map of responses to a review. A map is a document that details different types of reviews: negative, neutral, interrogative, positive, and so on.

Such a document, of course, takes a long time to complete. But it fully justifies the efforts, because as a result you have ready-made instructions and prepared phrases for almost any occasion.

When working with any reviews, there are communication rules:

  • do not get personal;
  • not to allow too familiar addressing clients;
  • do not use obscene language.

Sometimes in reviews, questions are asked to the seller or manufacturer. You should not ignore them, on the contrary, show the potential buyer the benefits that he will receive after purchasing the product. If you yourself used it – great: tell us how the product manifests itself in action, what are its advantages, distinctive sides, non-standard characteristics and non-obvious advantages.

If you do not know how to answer a buyer’s question in a review or comment, in no case give false information. Tell them that you need to get correct data and only then can you inform the person. You can even take contact information such as a number, phone number, or email address. Promise that, as soon as you receive information, immediately contact the person concerned through this channel.

If you realize that you made a mistake in something, immediately apologize to the client and provide the correct information. 

Important! In wholesale, reviews matter too. This marketing technique is actively used even by large corporations.

Develop a customer retention strategy

In pursuit of attracting more and more new customers, the company sometimes forgets about the people who are already bringing them money. And in vain.

Working with a base of existing customers is one of the most effective ways to increase the number of sales. Thus, customer retention is 7 times cheaper than attracting new ones, while loyal customers spend 67% more than new ones, says statistics. Here are some retention tools that can improve your customer retention. 

How to distribute the budget between acquisition and retention depending on the volume of sales.

If the company does not have the opportunity to build a whole strategy, then its individual methods can be introduced. Some of the easiest but most effective ways to retain:

  • Cashback. Refunding part of the funds from the purchase amount is an effective method to find regular customers. Especially if the refund is credited in real currency, not in bonus points.
  • Personalized discounts, promotions and sales with early access for registered users. Such methods increase the clients’ sense of self-worth. This is a fairly old, but still effective way of attracting, creating emotional and psychological attachment to the company.
  • Loyalty program. This system resembles cashback and assumes the availability of discounts and bonuses for regular customers. There are simple and complex loyalty programs. Simple – these are points for a purchase, complex – dynamic, the size of the discount is constantly increasing, and the client has access to exclusive offers.
  • Bonus for the next purchase, which will “burn out” if the client does not have time to use it within a certain period. It helps to stimulate the client to make further purchases, moreover, in this case, it is not even necessary to develop a loyalty program. The bonus can be submitted electronically or in paper form (for example, to be able to show it to the cashier). An example of such an incentive is Domino’s Pizza. The company calculates bonuses that can be used to pay part of the order value. Bonuses are active for 30 days, and then “burn out”.
Shopify Plugins

5 Must-Have Shopify Plugins to Take Your eCommerce Store to the Next Level

With approximately a 10% market share. Shopify stores throughout the world have achieved over $100 billion approx. in sales.

One of the main reasons people appreciate this platform is its built-in tools, which allow customers to increase the operation of their store and add unique features, in addition to its user-friendliness and excellent backend support.

The Shopify plugins are very useful, as they can be utilized to boost customer interaction, sales, and revenue.

Why use Shopify Plugins?

Top reasons why you should be looking into Shopify plugins

#1 Better Customer Experience

The Shopify plugins allow you to engage with your customers with interesting and interactive promotions. With customized promotions and a range of support in email marketing and Google AdWords, you can increase your customer base and make it easier to reach them with better conversion rates.

#2 Increased sales

Shopify has a list of Shopify plugins that assist in increasing the effectiveness of your eCommerce store by offering a wide variety of ways for retailers to engage with their customers and acquire more sales.

How to Choose the Right Shopify Plugins for Your Ecommerce Store

Shopify plugins offer a myriad of features and ways for improving this customer experience. You can connect your store to Facebook, create a cart, give customers the ability to save orders, and enable customer reviews. The inclusion of complementary features and new ones may not be so immediate, so you should take a look at what is available to see if it is something that can improve the customer experience.

5 Must-Have Shopify Plugins to Take Your eCommerce Store to the Next Level

If you are looking for ways to enhance your e-commerce store, look no further than the below list of must-have Shopify plugins.

#1 FeedGeni aka. Product Feed Generator

The Feed Generator App also ensures that titles are optimized so that search engines can quickly identify and display product listings when they are requested.

Advanced capabilities such as Product Mapping, which guarantees that product attributes are completely aligned with standards, and Inventory Rules Setting, which ensures that future products imported are ready to be used by shopping channels, are available.

#2 SEO Doctor

To perform well in Google Search results and gain web traffic, every website on the internet must be optimized. Shopify, like any other website, has to be SEO optimized in order to attract traffic and reach as many people as possible.

SEO Doctor is a Shopify SEO plugin that helps you fix all SEO issues and increase organic traffic to your business. It’s simple to set up and use. Manual and Automatic SEO modes are available. You can manually optimize SEO issues detected by its tools in Manual Mode. Automatic or Autopilot Mode, on the other hand, automatically resolves SEO concerns

#3 Image Doctor

For editing product images, the Image Doctor App is a simple to use Image Editor. Crop, Draw and Resize, to mention a few, are among Shopify’s basic Image Editing tools.

The Image Doctor App functions similarly to an image editor on your phone. It includes both simple and expert image editing techniques, such as cropping, flipping, and rotating images. You can adjust image brightness, white balance, noise management, and pixelation.

It comes with more than ten color filters to enhance the look of your product photos. On the Images with Emphasis, add custom colored text. To further enrich the images, overlay unique and pre-built icons with coloring options.

#4 Sumo

Uncertainty about how to expand an eCommerce business b2b is one of the most important issues that eCommerce business owners encounter. Even after learning more about the established tactics, they often find it challenging to implement them in their store. Is this something you’ve heard before?

As a result, Sumo has launched Sumo Shortcuts, a solution to the concerns mentioned above. To build your email list, reduce cart abandonment, raise average purchase value, convert window shoppers, and more, start using Sumo now. Sumo’s shortcuts make it simple to convert your website visitors into eCommerce clients.

#5 Referral Candy

Referrals are an extremely effective sales strategy in general. In 80 percent of transactions, personal recommendations have a role.

ReferralCandy is a simple-to-use Shopify application that offers one of the most branded, seamless referral programs available. It’s one of the best Shopify marketing applications because of this. You can choose from a variety of perks and incentives when you use ReferralCandy, including cash, coupon coupons, and one-of-a-kind items.

They’re also all immediately paid out. In terms of branding and customization, the tool gives you a great deal of freedom. No coding skills are required for the setup process.

Conclusion

There are numerous strategies to optimize your e-commerce site as an e-commerce store owner. These plugins can help you upsell and cross-sell products, enhance average order value, and build customer loyalty, among other things.

Crypto Exchanges

Some of the Biggest Crypto Exchanges and their Details

Biggest crypto exchanges are the ones that can handle the most trading volume and a few other factors. Some of the largest exchanges are quite well-known as they offer outstanding services to their users. However, it is not necessary that the features offered by each top exchange also fit well with your criteria and requirements.

Therefore, to make sure you choose the right exchange you need to know about some of the largest cryptocurrency exchanges. Once you have an idea about the largest exchanges and some of the features they offer, you can determine which of the available options is best for you to choose.

Here is what you need to know about the biggest exchanges and their features.

Biggest Crypto Exchanges – Coinbase

The Coinbase exchange is one of the crypto exchanges based in the United States of America. It is arguably the biggest platform in the country and is undoubtedly one of the best ones. It was established in 2012 and is now among the safest exchanges in the crypto market.

Since its establishment it has outperformed some of its competitors and now extends its services to around 43 million users from over 100 countries across the globe.

Coinbase is not only one of the largest Bitcoin exchanges but it is also one of the most suitable ones for beginners and experts alike.

The platform introduced its wallet in 2018, which allows users full control over their assets and wallet. Users are even provided with a private key to ensure safety of their funds. This exchange supports more than 55 digital assets and also offers insurance on them.

The Coinbase exchange supports more than one payment method and uses high-end security systems to prevent any kind of cyber threats and failures.

If you are a beginner and you want to find the biggest cryptocurrency exchanges then Coinbase can be one of the best options for you. As a beginner you can make use of the available educational content and videos to learn about crypto trading and more.

On the other hand, if you are an expert you can use Coinbase Pro, which is an advanced version designed specifically for the professional traders. This version also has features and advanced trading tools for the expert traders.

Binance Exchange

Binance is a name every interested party must be aware of as it is the largest crypto exchange in the world. This is one of the most prominent crypto exchanges you are likely to come across when you start crypto investing or trading.

This platform is not only one of the largest cryptocurrency exchanges but it is also one of the best ones. The security it offers to the users, along with other services are all essential factors that you should know about.

It was established in 2017 and is now one of the most outstanding crypto exchanges in the market. It is a centralized exchange that caters to the needs of both beginners and experts alike, making it a suitable option for you.

Apart from being recognized as one of the biggest cryptocurrency exchanges it also offers support to 400 trading pairs. It offers one of the lowest fees in the market and uses leading-edge security systems to protect the users’ funds and information.

For the beginners the Binance exchange has free educational content such as guides and tutorials. Whereas, for the expert traders and users, this platform offers advanced trading tools. There are also two types of trading interfaces known as Classic and Advanced, designed for first-timers and professionals, respectively.

KuCoin Exchange

The KuCoin exchange is also one of the largest Bitcoin exchanges in the market. It was founded in 2017 and is now one of the top crypto exchanges in the market. It is developed well enough to offer its services to all types of traders, beginners and experts alike.

It is a technologically advanced crypto exchange and offers outstanding features to the users. The services it offers makes it one of the biggest cryptocurrency exchanges that is also one of the best ones for all types of interested parties.

It uses cutting-edge security systems and also requires KYC verification to offer utmost security to the users. It supports around 200 digital assets and margin trading while offering up to 100x leverage.

The KuCoin also supports multiple payment methods, along with free trading bot and crypto lending. Users can also use the basic and advanced order types available.

Conclusion!

Finding the best crypto exchange from a list of the biggest cryptocurrency exchanges can be easier and convenient if you know your options and some details about them. As a first-timer, you should know about the above-mentioned options and the features that they offer to their users. 

How Does Installing an Access Control System Help Your Business

Security of the commercial building is the foremost concern. Yet, many business owners underestimate the workings of an access control system. By installing a control system, you reduce the chances of risk due to theft, being locked out or loss of valuables. Plus, you get the option of restricting those areas in which you want access to only a couple of employees. 

Security is an ever-changing subject. However, now the system that is becoming more popular is the keyless entry and the Door access system. It helps make the interior offices and buildings secure and safe for those who own the places and those who work. 

Reasons You Need to Install an Access Control System in Your Building:

The following are the specific reasons why you need to install the access system in your office building and how can it help your business:

  • Gives You Control Over Employee’s Access:

 If an employee leaves or get fired, you will have to call a locksmith to change the key to the doors and cabinets for future safety.

However, the problem can be avoided when you have an access control system at your office. Every time an employee leaves your office, you can easily change the card or the code through which they got access to the building. 

  • Keep a Check on Your Employee Activity:

The most important reason to install an access control system in your office is to be able to track the employee’s activity. For example, you can check the time they spent in an area and if they are accessing any unauthorized site.

In addition to this, you can also get access to customizable reports like your office’s open and closing hours, alarm details, building security, etc. Also, you get the option of getting the report via email or as a notification on your smartphone. 

  • No More Losing Keys:

When you have an access control system that facilitates fingerprints, key codes, or other selections, you can prevent the case of losing keys. Thus, it is a great choice to opt for if you are a person who often misplaces your thing. Also, if you have too many employees in your office and cannot deal with them losing the keys. 

  • Reduce The Chance of Theft:

It is not only outsiders from which you have a threat of being robbed. In many cases, the insiders of the company to steal and they not just steal valuable assets but also valuable data and information. . In these conditions, having an access control system can be very advantageous. Although the problem is not solved by 100%, it can reduce to a significant level. This is by prohibiting your employees from entering the unauthorized area or the building itself after working hours.

  • Avoid Getting Locked Out:

Most business who does not have an access control system struggle with employees getting locked out of the building. This can be the situation when the employee has arrived early for work and must wait for guards to unlock the building.

On the other hand, it can also be the condition when the employee ran out of the office in emergency and found the door locked when they returned. So, it’s better to switch to the modern access system to avoid these frustrating situations. Also, it helps to reduce the time lost waiting for guards to fix the problem.

Conclusion-

These systems help the business in many ways, like keeping track of when employees are entering or leaving the building. Also, who are accessing the unauthorized area? In addition, it also saves you from the loss of theft or the expenses you must incur in rekeying the door. So, make sure to consider changing your security system to this access system.

GogoPDF: Its Quick and Easy Word to PDF Conversion Process

Did you ever encounter problems when sending and receiving Word documents using different social media platforms like Gmail and Facebook? Perhaps you noticed that the texts that it contains were not in their proper places, which made it hard for you to understand the report. Sometimes, the data is in different fonts and spacing, ruining the aesthetics of the file. If these things often happen to you, now is the best time to convert it to PDF. 

Since you are in a fast-paced world, you would want a converter that can help you maximize your available time. Aside from that, it must be within your budget, so what most people would recommend to you is GogoPDF. It offers its services for free and you can access them as long as you have an internet connection. If you are not aware that it exists, you are missing out on a lot of great things. 

Why is there a need to convert Word to PDF?

In today’s digital age, people take advantage of technological tools and innovations to make their lives a little less stressful. One of the things you can use to have a more enjoyable work from home experience is by using the Word to PDF converter of GogoPDF. However, you might be hesitant to do so because you don’t know its importance.

Nowadays, portable document format is the most popular type of file among working adults and students. It surpassed the popularity of Excel and Word because of its great features. For instance, you can easily access it no matter the kind of device you are using because it is compatible with all major operating systems. If you are using an Apple laptop, the recipient can still open the document with the same quality even if they are using another software such as Windows. 

PDF is more advantageous than Word documents because the latter often presents a lot of compatibility and formatting issues. But it is an ideal file format if you wish to create journals and compositions. When sending it to other people online, they will encounter difficulty in reading and understanding its content. For sure, you don’t want to cause any inconveniences to your colleagues and superiors, so might as well convert it to PDF before sending it. 

A detailed explanation of the conversion process

GogoPDF offers the most straightforward conversion process, allowing you to do the task in just a few minutes. You don’t have to spend a significant amount of your time just to have a copy of the converted document. It is a user-friendly tool, which means that you can perform the conversion process all by yourself. There is no need to ask a friend or colleague to help you out. Check out the detailed explanation about how the tool works so that you will not feel lost when you are already accessing the website.

Step 1. Click the Word to PDF tool 

Get whatever device is accessible to you right now such as smartphone, laptop, or computer, and connect it to high-speed internet. Then, open one of the most reliable browsers installed on your device to search for GogoPDF.com. Make sure to click the Word to PDF tool on the home page to reach the needed tool. 

Step 2. Drag the Word file to the toolbox

For the online tool to start the conversion process, you have to upload the Word file to the toolbox. The upload time usually takes more or less one minute depending on the file size and internet speed. You must open the file folder, click the document you wish to convert, and drop it into the toolbox. The method of making the file available on the website is different if you are using a smartphone or tablet. You will have to click the select a file button and double-tap the needed file. Once you verify that you uploaded the right document, click the Convert to PDF button. 

Step 3. The tool will scan the uploaded document

Before the tool can proceed to the conversion process, it first needs to scan the uploaded document. After ensuring that it is in the right file format and it is free from malware and viruses, it will immediately convert it. Within a few seconds, expect that the converted file is readily available for download. Don’t forget to have a copy on your device’s local storage so that you can open it whenever you want despite not having an internet connection. You may also save it on your Google Drive or Dropbox account to access it even if you are using a different device. If your local and cloud-based storages are already full, you may just copy the URL generated by the website and share it with your desired recipients. 

In Conclusion 

GogoPDF has a Word to Excel converter that is very easy to use. You only have to follow the three steps listed above to have a copy of the PDF document. Use it now to save not just time but also your hard-earned money!

pdf to word

A Guide to Converting Your PDF Files to Word in 4 Steps

When it comes to document making and handling files, there’s quite the tension between PDF and Word files. Some people prefer one over the other due to a variety of reasons. These reasons may include the ability to retain formatting, ease of editing, and many more. Depending on the person, their preferred file format varies.

Looking at the issue objectively, it is more rational to use the file format that suits the situation the most. For instance, it might be better to use PDF when sharing files over the internet to preserve document formatting and confidentiality. On the other hand, using Word might be better in editing the work. Let’s talk more about these two below, so stay tuned!

PDF vs. Word

PDF stands for portable document making format, and as we’ve mentioned, it is a popular file format for file sharing. It essentially acts like a print-like image of your document’s contents. They appear precisely the same on every computer that you view them on. Additionally, you can impose password protection on them. You can change them to Word files using a PDF to Word converter

On the other hand, Word files is a much more famous name than its original – DOC files. Nonetheless, let’s stick to the vernacular and just call them Word files. Word files often require paid word processors like Microsoft Word, which requires a subscription. It is the file format you use when using a word processor, typing your documents, and saving them as an editable copy.

Unlike PDFs, they’re relatively terrible in maintaining formatting and might not be accessed by other people who have no word processors installed on their computer. Nonetheless, they still have some advantages over PDF files.

Word files are best for editing

Yes, you’ve read that right. Word files are best when editing. The main reason being is that you can have more options in doing edits with your document. You need editing tools for PDFs which might come for a fee. Moreover, the room for modifications isn’t really much flexible. That’s why it’s hard to edit them.

You can use Microsoft Word or other mainstream word processors that come with many features like grammar-checking, writing tools, inserting images, and many more that are absent in editing tools. Overall, Word files are indeed much more straightforward to modify than PDFs. So, do you have PDFs that you want to edit? Do not go through the tedious task of copying or retyping everything, and instead follow our tip below!

Convert PDF to Word with online tools

Though copying and pasting are relatively easy to do, they unnecessarily eat too much time, after all. The web contains many powerful online tools that can help you in numerous areas. Some of them specialize in handling PDF to Word conversion. Try searching on your browser, and you would see many file converters on your screen. We recommend using PDFBear’s PDF to Word converter for a couple of reasons that make it stand out from others.

PDFBear’s PDF to Word converter is a 100% free online web service. It keeps your PDF documents safe under tight security while performing the conversion in a short time. You can practically enjoy quick and secure file conversion with no fees at all! Just go to this tool, and follow the steps that we’ve provided for you below.

  1. Upload (or drag and drop) your selected file to the converter.
  2. PDFBear will automatically scan your file and convert it to Word.
  3. Wait to finish.
  4. Save your newly converted file!

You can use the converter even with only basic computer knowledge. It requires no software downloads at all! Moreover, PDFBear not only converts the text in your PDF file but all the other elements, such as images. Indeed, the use of such online tools reduces human error and saves you time and effort! 

Curious about how the PDF to Word conversion happens?

PDFBear utilizes OCR technology, which stands for Optical Character Recognition. It scans your PDF for the text and converts it into a machine-encoded version. Of course, this technology isn’t limited to PDFs, as they also operate on images. OCR is a part of the tool that gives you the convenience of not copying and pasting your PDF (which may not be done due to some restrictions for specific situations).

Final thoughts

Though the two file formats have their own advantages, you can only maximize their features by using them where they are needed the most. If you want to edit your PDFs, it might not be possible without spending some bucks on editing tools. But, what you can do is convert them to editable copies like Word files.

With the vast web and PDFBear, you are now capable of doing PDF to Word conversion while spending minimal effort. Go grab your files now, and start converting them with PDFBear’s PDF to Word Converter!

pdf to word

Be Effective at Work: Use PDFBear to Turn Word to PDF

Have you had trouble sending and receiving Word files from different users? Have you ever written a Word document and realized that the recipient’s fonts and spacing differed after you sent it? Lastly, do you have problems with your Word documents and are unsure how to convert them and what to convert them to? If that’s the case, you’ve come to the right article.

In today’s fast-moving business sector, everybody must make the most of their time. People require a Word to PDF converter that can be accessed instantly and from any location. Given that we all use the web, we’ll need a reliable online converter tool. If you’re on a limited schedule and budget, free online converter tools like PDFBear are the best thing to have.

Why Convert Word Files to PDF?

Portable document format files are very popular as the most convenient and well-established files that have ever occurred in the electronic era. PDFs work with a variety of operating systems and are adaptable to almost any gadget. If you send a PDF file from MacBook to Windows software via email, the other user will get a similar high-quality result.

Word files, nevertheless, continue to improve modern lives by providing the most suitable and comprehensive tools for typing improvisations and papers. However, there may be formatting and compatibility issues if you send a Word file from Microsoft Word 2010 to someone who uses Microsoft Word 2019. This is one of the most important reasons why there’s a need to convert Word to PDF.

People who do not have the tools must hire experts to turn their files from and to PDF. However, thanks to technological advancements, it is now possible to convert Word to PDF for free. Online tools like PDFBear will undoubtedly put an end to your PDF woes. Take your time to learn how to use such tools by reading, understanding, and trying them.

How to Convert Word to PDF and Vice-Versa

Although you can effortlessly save your contents to a portable document format, there are still several factors that can have a long-term impact on your document. Furthermore, PDFs are easier to send online than any other format. Using PDFBear to convert Word to PDF is the best solution since it’s a free online tool with a user-friendly interface. Keep this procedure in mind when converting your Word file to PDF.

To start, go to PDFBear’s home page and select the “Word to PDF” feature. Next, navigate to the folder containing your Word file, pick it, and drag it to the PDFBear converter toolbox. In a matter of seconds, PDFBear will transform your file. By tapping “Download” afterward, you now have a new PDF file. You can copy the URL and send it via email or messaging sites, or save the file to your computer or online storage like Google Drive or Dropbox.

Converting PDF to Word becomes the perfect idea if you have documents in PDF that need extensive editing. PDFs are rigid by design, and they can’t be changed while they’re in this format. If you convert your PDF to another file format, however, you can make significant changes. As an example, consider the following guidelines.

Select the PDF to Word option from the PDFBear main website. Navigate to the folder containing your PDF file and drag it to the converter feature. Choose whether you want to turn Word to PDF without OCR or with OCR. By clicking “Download,” you can copy the URL or save the file to your device.

Security and Quality Are Guaranteed

While it is very efficient to upload and transform files online, we cannot deny that we are putting our records at risk. If you’re in charge of secret information, you’ll want to take extra precautions with your files. With PDFBear, you can rest assured that your files will be protected from prying eyes and unpleasant rivals.

Solid Documents collaborated with PDFBear for better security and quality of the documents. Your conversions will be of the best standard, as will the security agency. Its secure SSL connection and advanced security system will dynamically replace another connection after each upload, ensuring that your previously uploaded files are removed from the application.

In a Nutshell

Word and PDF files are incredibly user-friendly and operationally efficient. They have made essential contributions over the years and continue to be of assistance to this day. Knowing when to use what is critical in saving time, energy, and resources. Keep yourself out of trouble by mastering your digital documents. If you got any trouble with PDFs, either you want to convert it to other formats aside from Word such as Excel and PowerPoint, then don’t hesitate to depend on PDFBear. It is a very versatile online PDF tool that will never let you down especially when you’re in trouble with documents.

software testing

Multi-Experience Platform Testing for your Versatile Business Application

The absolute number of devices available for business and entertainment use is increasing while the latest technologies empowering the user experience are also rising. These developments in the tech industry have expanded the need for agile model implementation more than ever. And it is not just about software development, testing & QA also need to pick up pace. In this regard, Multi Experience (ME) testing is the comprehensive solution to curb these challenges.  

ME testing provides maximum control over the Software Development across multiple tools, devices, & technologies. This allows the testing team to cover all the differences in testing and connect every aspect for better results. 

Multi-Experience Development Platform (MXDP)

Multi-experience development includes engineering apps on which several modalities like voice, gesture, text touch, AR, VR are run. – blessing users with consistent UX across all platforms whether mobile, online, immersive, or other units.

Due to the rise of Multi-Experience Development Platforms, mobile and web apps are mostly developed in parallel. Multiple software testing tools assist organizations to perform multi-experience testing precisely and effectively. In Addition, the urge to interact with users on a personal level for a better user experience through customized app performances has allowed enterprises to do R&D to formulate more advanced ways to engage users. Keeping a consistent user experience while innovating latest and personalized avenues also assures a smooth product delivery. In this regard, the test automation practice comes into play and helps enterprises to reduce the time-to-market length without skipping innovation and improved user experience. That is being truly in agile spirits. 

The Shift Left Strategy

In an agile environment, teams work faster and cooperate more effectively. In the shift left strategy, skilled testers work in tandem with developers, particularly, in the early developmental stage.  

The shift left QA allow testers to participate from the planning phase of a software development cycle. Testers work closely with developers in order to debug any issues before they enter into the production stage. In another case, testers work with API developers during the production phase to assure an error-free delivery.  The shift eft approach is iterative and therefore assures quality at speed in a product delivery. 

Test automation enables faster test cases generation which increases test coverage and traceability with operation expenditure reduced to almost half.

How to Shift Left for Test Automation?

In all phases of the SDLC, it is essential to define the test lifecycle.

  • Uncover defects early to optimize time and enhance the efficiency of the overall development process.
  • Integrate development and operational processes to avoid task replication while test cycle optimization.
  • Maintain quality checks to enable timely & counteractive action.
  • Test releases must be carefully planned to manage available resources and prevent potential risk.
  • Plan & execute test cases that include most functional scenarios.
  • The development and operations teams must follow DevOps iterative model and assure integration of automation for result-driven teamwork and greater collaboration between the resources involved.
  • Assure a continuous feedback pipeline for testers, developers, and operations to mitigate errors and miscommunication to reduce delays and deliver quality at a value.

Performance testing is an integral factor to deliver excellent applications. The integration of the Multi-Experience Development Platform is crucial to assure product accuracy across all possible forums, platforms, versions, and environments for smoother app performance. For these reasons, testing and shifting left are critical for a multi-dimensional app location. Due to the latest automation testing tools (like Jira test management tools), codeless test automation, and performing app QA through MXDPs have never been this convenient for the already troubled testers.

Test Automation Testing for MXDP testing

Test Automation depends on automated software testing tools that plan, build, and run a series of test cases. The practice substantially decreases the time consumed in the software development lifecycle while constantly helping to enhance the product quality at value & speed. It saves time and promises better value for money.

Testing automation has many benefits, including helping companies meet their testing objectives within the required timelines. Most of all, ensuring and meeting all anticipated client requirements in the process. You can achieve all the perfection in your product experience and maximum user experience through numerous Jira test management tools that assist testing and other agile processes robustly. Furthermore, cutting-edge automation testing tools like Kualitee and other good equipment available in the vast market efficiently help testers in MXDP testing and proves beneficial to your business for plenty of reasons mainly in terms of maintaining and returning your invested revenue on a high scale. 

Button designing Tips for Getting Click

Button designing Tips for Getting Click

Button design is comparable to UI design and highly affects the fundamental layout of your website. Buttons have the power to make your website on the top and top to bottom. 

Buttons are the main element in your designing site that helps in the engaging conversation between the product and a user. Buttons can be placed anywhere. These buttons may also work as navigation in your website. In this article, we are going to discuss a few beneficial tips and tricks to design a button;

Tips and tricks for button designing

The designing button seems like a small point but actually, it doesn’t. It’s an easy factor to design professionally by a designer;

Easy to Find

While designing a button, try to make it simple to find by users. No one wants to scroll up and down and see around in search of a button. You should need to place a button in front of each page that makes sense of the product and attracts viewers to click on it.

Color Contrast

Colors affect the personality of humans greatly. It plays an important role while designing a button because colors have the power to get attention from humans. 

Cool colors are blue and white, produce a calm and smooth effect. While red and orange are warm colors, produce prominent effects. 

Size 

Everyone doesn’t hold a touch pen or a mouse in their hands. You should need to build an appropriate size of the button that is easy to design. You should need to design as it was easy to click with a fingertip. 

The recommended size to design a button 45 * 57 pixels. 

Feedback 

Feedback is an important step in every single website of designing a button. It makes helpful for visitors and helps them to assure that they are moving onward the right size. 

Code / Graphical Button

Most of the designers prefer to design code form instead of the graphical layout. This is because, in graphical format, you need to face some difficulties;

  • Take time in loading.
  • Not displayed in email. 

Code-based buttons can be used easily in every single template. Also in HTML, CSS, and emails. 

Testing 

Testing is an important element after every single step. Make sure to test it at once after completing all layouts. If you are completely okay with your template, layout, button designing, and features then move on to the major step of testing. 

Test the whole project especially buttons at once before sending it to the client. 

Action Words

Buttons having metaphors in them. These are the little words in a button that completely tell the user, which function is performed if he/she clicks the button. 

A few of the action word with or without a verb, commonly used are;

  • Email- sign up
  • Whitepaper
  • Download and white paper
  • Go back
  • Learn more

Strong Bond

The viewers need to know what a developer asks you in the code of a button. The code “Learn more” is used when the user wants to know more details about the content. If the button text is “email-sign up”, it is used when you want to log in and sign up to your account. 

If you are having your website or in search of a perfect designer. Then, you are on the right way. A lot of web designing companies in Pakistan are available around us providing their unique services but you need to choose the best one. I’ll recommend you to take a view on Web Masters EYE. So, why are you standing here? Go and visit the site of Web Masters EYE and pick up your affordable packages.

seo services

6 Reasons Why Your Business’s Local Search Efforts Should Not Stop

It’s critical that you don’t halt or pause your marketing approach when it comes to using local search marketing for your company. Why?

When contrasted with paid advertising, for instance, local search takes time to become effective and does not produce quick results. Stopping your efforts effectively returns you to square one.

And, in certain cases, restarting your local search marketing after a break can be more difficult than starting from scratch. Suffice it to say, when done effectively, local SEO allows customers to acquire information about your organization quickly and simply, taking them one step closer to closing a deal. This is why companies tend to hire the best local SEO Services in dallas they are available with.

Coming back to the importance of local SEO, here are the reasons why you shouldn’t quit doing local search marketing (also known as local SEO):

There Is No Need to Compete for New Business

When it comes to local search, you’re competing with other businesses on the internet. You are no longer fighting for the top slot in the local pack if you cease or freeze your local search efforts. In the end, you’re handing your competitors more business. The first few firms in the local pack are usually clicked by customers. They won’t have the opportunity to choose you if your business isn’t there. Additionally, your listings are no longer attracting new visitors. Less new visits means less revenue.

Facing Difficulty in Generating Reviews

Following up on the first point, if your business is not really being found or picked online, you’ll notice a decrease in the amount of reviews it receives. Furthermore, reviews assist customers in determining whether your company is the perfect fit for their needs. However, if you don’t get reviews on a regular basis, it’s a sign that your company isn’t trustworthy. It’s just as bad to have no recent reviews as it is to have negative or neutral ratings.

Your Pictures Aren’t Getting as Much Attention as They Should Be

Consumers will appreciate it if you include photos in your local search listings. You can draw attention to your products, services, and previous projects. Consumers will not see your photographs at the scale they were previously if you do not maintain your local search presence. Photos, like reviews, can help you enhance your search ranking.

Refreshing Your Pages and Listing Is Required

Based upon material Google and other search engines look for specific information and rank pages. If information is not updated in these places, your material will become old, and your search ranking will likely suffer as a result. If outdated information emerges, internet users will be confused as to what information is correct, and your company’s search ranking may suffer as a result.

Monitoring of Technical Issues

Monitoring your listings is an important component of local search maintenance. Technical problems can arise from time to time. It’s unlikely that you’ll notice any technological problems straight away if you discontinue your local search efforts. Allowing technical faults to go unchecked might have an impact on your overall search score, making it more difficult for clients to reach your company.

Need for Generating More Social Media Content

SEO requires you to update your material on a regular basis. You might expect a drop in social media shares if you stop refreshing your article. When you’re not producing fresh content, your viewership and engagement will decline if you start sharing less of your material on social media. Consumers nearly always examine social media channels to determine if a company posts on a regular basis. If people realize that your channels are short in content, they will most likely move on to another company. Nothing is more frustrating than having a social media presence for your company but failing to post or share new content.

A Final Word

To sum it up, local search is an important aspect of any continuing digital marketing strategy when you look at the broad picture. Your local search strategy may take some time to become effective, but it doesn’t imply it’s not working. If you stop working on local SEO before it has a chance to mature, you may have to work harder to bring your local search back to where it was.

The key here is hiring an Expert SEO company that knows in and out of the local search engine optimization. Handing over this responsibility to an inexperienced personnel will do nothing but waste your time, efforts and monetary resources. So, do your due diligence and get the best services to improve the ranking of your business.

telemedicine

What Is Telemedicine and How Does It Work

You wake up one morning to sniffles and a high temperature. Dragging yourself out of bed, you begin to make your sluggish way to the clinic.

Travelling makes you feel even worse, and when you finally reach the queue seems to never end, and the cacophony of people coughing and sniffling around you builds. 

If only there was a way to visit the doctors without being in close proximity to the sickly crowds, the glacial waiting times and the travelling…

Welcome to telemedicine.

Telemedicine platforms have seen a meteoric rise due to the Covid-19 pandemic, with more and more people feeling comfortable meeting and consulting their doctors over their smartphones or laptops rather than the traditional way of going down to the clinic or hospital for a medical appointment. 

What Is Telemedicine? 

So what exactly is telemedicine? 

It is most commonly described as the use of communication technology to connect individuals to their doctors who can provide them with the healthcare services they need. With the advancements in technology and video conferencing platforms, like Zoom and Google Hangouts, rising in prominence during the Covid-19 pandemic, the traditional doctor-patient relationship no longer needs to be confined to a physical visit to the clinic. 

This is not only beneficial for individuals with reduced mobility, but it also makes booking and attending doctor consultations more convenient for everyone as it diminishes the need to physically travel from home to either a hospital or clinic and also allows for more flexibility when it comes to scheduling appointments. 

How Does Telemedicine Work? 

There are currently a whole host of telemedicine platforms available to the masses, either set up by private healthcare providers or insurance companies, which can offer doctor consultations, prescription of medications and provide medical certificates to patients. 

Should you have access to a reliable internet connection and have either a computer or a smartphone on hand, you will be able to utilise telemedicine as a viable way to consult a doctor. 

For most telemedicine platforms, you will first need to sign up and do up an application that will have you list out your medical history. After signing up, you will most likely have to answer some questions about your current medical issue so that you can be referred to an appropriate doctor who can diagnose and treat the medical condition. 

The consultation will take place over a video conference call either on your computer or smartphone where the doctor can assess and diagnose your medical condition. After doing so, they can prescribe and get the medication you need delivered. They can also provide you with an electronic medical certificate should you need it. 

Who Is Telemedicine For? 

While telemedicine makes it convenient to consult with your doctor, it is not always suitable for every case. By providing healthcare services through video conferencing calls, doctors can be limited with how accurately they can diagnose and treat complex health conditions through an electronic device. For example, patients with health conditions that require extensive laboratory testing like hypothyroidism or anemia are advised not to use telemedicine consultations, and should instead meet their doctor face-to-face. Telemedicine consultations are also not suitable for emergency situations like heart attacks, strokes or broken bones. Health conditions that require immediate medical attention should be done in person at a clinic or a hospital. 

Telemedicine is best suited for simple medical conditions or for follow-up consultations with your doctor. For example, should you have caught the common cold, flu, sore throat or other common health issues, these are best addressed using telemedicine as you do not need to travel down to a clinic to get a diagnosis, and can get prescription medication delivered directly to you. 

How To Check The Legitimacy Of A Telemedicine Platform 

To ensure your safety and to avoid cases of medical negligence or malpractice from occurring, it is important that before you engage with a telemedicine platform and share private medical information, you check that they are a legitimate healthcare provider that has been registered with your country’s health department. 

Telemedicine platforms are legally obligated to ensure that the doctors they engage to provide consultations are competent and qualified to do so. Before engaging with the telemedicine platform, check that the doctors they have on staff are listed on the registered licenced practitioners in your country. 

Telemedicine can be a convenient way for individuals to get the medical care they need at their convenience without having to travel down to a clinic or a hospital. However, telemedicine will not replace the need for face-to-face consultation as there are still many instances where telemedicine consultations will not be suitable (such as emergency situations and for complex health conditions that require extensive laboratory testing). It is also important that the patient ensure the telemedicine platform they are looking to engage with is legitimate and registered with the country’s health department as a healthcare provider to avoid cases of medical malpractice or negligence. 

Writers Blurb

Jules Loke is a Content Writer for Noah and Zoey, a digital health clinic for men and women alike in Singapore.

dedicated server

Why Choose Dedicated Server China for Business Website Hosting?

In the ever rising world, users mostly have three primary choices of web hosting to access the complete server, including Virtual Private Server, Shared Server, and cheap Dedicated Server hosting. Each server comes with intense benefits with potential drawbacks. Therefore being a business owner, you need to go through the marketing hype to know more about the hosting capabilities of each server. After choosing a cloud provider, security becomes important more than ever. If you’re using google cloud then you might want to look at google cloud penetration testing guide for offensive security. After choosing a cloud provider, security becomes important more than ever. If you’re using google cloud then you might want to look at google cloud penetration testing guide for offensive security. After choosing a cloud provider, security becomes important more than ever. If you’re using google cloud then you might want to look at google cloud penetration testing guide for offensive security. Check out Cpanel alternative.

It is observed that shared servers are the default choice for most businesses because of the cheap cost. But unable to meet your business website requirements, i.e., less secure, risk of data confidentiality, poor connections, etc. Similarly, VPS is not appropriate because of sharing its CPU usages. Therefore, Dedicated Server China comes into the spotlight, giving you a user-friendly platform with a vast range of reliable services and exclusive features. More you will get to know later in this post.

If you are willing to know Why Dedicated Server China by Serverwala is considered the best and most appropriate for your business website hosting, this guide is for you. So, let’s get started without delay and know the major differences between Shared and Dedicated Hosting.

Read more: The Need for Dedicated Servers for Small Businesses Keeping the Price Factor in Mind

Which One is Best for Business Website: Shared vs. Dedicated Server

Whether you are a tyro or commencing your business, you need a platform to host your website. That platform depends on your business website requirements and needs. Some choose shared hosting, while others go with Dedicated Hosting. Let’s know which one is the best fit for your business website.

Shared Server: Cheapest web hosting that comes with limited services and resources. It is best for small or startup businesses who require only primary resources to start their business. Shared Hosting is less expensive, less secure, unable to handle high traffic.

Dedicated Server: It is powerful and robust web hosting that gives you bundles of reliable resources and effective services with consistent support. You can host your business website has thousands of web pages while ensuring more excellent uptime, customization, high speed, root access, easy upgrades, and much more than Shared hosting. Furthermore, Dedicated Server Hosting China it gives you a high-performing platform that boosts your site performance and handles high traffic during busy hours without letting your site down. This feature is missing in shared hosting.

To better understand the difference between both, look at the below-mentioned table, which gives you a clear difference.

FeaturesShared HostingDedicated Hosting
Server Hosted SitesHost various Websites on  a Single physical ServerDedicated for one website
SecurityNot secure because of resource SharingHighly Secure because of Dedicated Resources
BandwidthLimited BandwidthUnlimited Bandwidth
AdministrationRestricted Access optionsPermissions with smooth access
Root Level ControlRestrictedAllowed
RAMLimitedHigher RAM(upgradable)
Disk StorageLimited StorageHuge SSD Storage
Performance and SpeedLow performance and slow speedOptimized performance with Unmatched Speed
CostLowHigh

By overviewing the differences between a China Dedicated Server Hosting and Shared Server, you will get your answer which web hosting is best for your business website. So, hope you have decided to choose the dedicated server. If this is not sufficient for you. Then we will let you know the premium benefits of having a China Dedicated Server Hosting. Let’s see.

Benefits of Serverwala Dedicated Server Hosting in China

Dedicated Server China is one of the highly demanding web hosting for large scale businesses such as E-commerce and Shopping websites. Moreover, it gives you premium features and an array of reliable benefits that you can employ to grow your business. So, let’s dive into the principle benefits and cross check if a Dedicated Server in China is the one you are looking for for your business website.

#1. Better Performance

Performance is the key factor that helps to engage your visitors on your site. This is because users mostly want to stay on a high performing website rather than sluggish websites. Therefore, Dedicated Server Hosting China gives you the best and robust hardware specifications that serve the optimized performance of your website.

#2. Excellent Uptime

Uptime assurity is important to ensure reliable network connectivity. Therefore, China Dedicated Server gives you 99.99% uptime to ensure your site will stay up and never face any downtime even if any activity and mishappens occur on other websites.

#3.Control Over Server

Shared Hosting being monitored and managed by your web host never let you access the server. Whereas in a China Dedicated Server Hosting, you will get the complete root level control to your server. So, you can easily make changes and modifications on your server by ensuring to take care of server configurations.

#4. Standard Security

Security, as usual, plays the most vital role for every business that wants to do their business live. You can’t expect the standard level of security with a shared server because it shares its physical resources with other websites. In contrast, a dedicated server in china gives you committed resources hence offering an elevated level of security. It includes DDOS Protection, Server Secure Security, Anti-viruses, Malware Scans & removals, and much more cyber security measures to protect your data from unauthorized access and attacks.

#5. Easy Customization

Similar to the previous one, Customization is not available with the shared hosting. Whereas it’s the most important factor that saves you from upfront charges. You can get these benefits with the China Dedicated Server that allows you to customize your resources such as bandwidth, storage space, memory, etc., as per your business website requirements and needs.

#6. Robust Hardware Specifications

Hardware is the most important, or we can say a building block of any website that helps in employing the highest performance, fast speed, quick web page loading speed, and much more. Therefore, it’s one of the most beneficial perks of having a dedicated server china hosting for your business website. This is because it gives you all the compelling factors needed to run your site, engage more visitors, and accelerate your business growth.

#7. Better Customer Services

Customer support is the most important benefit that most businesses promise to give you but cannot fulfill. But Serverwala’s Dedicated hosting values your time and money. Hence provide reals time server monitoring and maintenance services with 24*7 consistent support. Also, their support team is always active in resolving your technical issues and gives you a better customer experience.

I am damn sure that you have chosen Dedicated Server Hosting China for your business website at this point of discussion. But do you think from where you buy this hosting? Not yet! No issue. We will recommend you the best and reliable web host. So, let’s check whether Serverwala meets your business requirements or not.

Choose The Best China Based Dedicated Server From Serverwala

For starting or growing your business, you need two things prior. One is the web hosting you have decided on, and another is the web host that gives you affordable hosting with exclusive benefits. For that, I would like to recommend Serverwala Cloud Data Center is the best option. The company provides you with Cheap Dedicated Server hosting China plans with bundles of benefits and exclusive features. These benefits include the highest uptime, high-performing platform, unlimited bandwidth, network efficiencies, robust hardware specifications, and much more. Moreover, the serverwala ensures 24*7 constant customer and technical support through real-time server monitoring services. So, you can connect via Live chat, Email, WhatsApp, and ticket support for instant support and enjoy your business website hosting.

In a Nutshell

Shared platforms are beneficial for some startup businesses. If you want to start and host your business site, then choose the shared server. If you are running a large-scale website like an E-commerce site that requires high-performing, reliable, responsive, fast speed, and fast web page load servers. At that moment, you should choose the Dedicated Server in China that gives you industry leading services and premium benefits at an affordable cost. Therefore, it is a perfect and ideal choice for your business website.

Fix Windows 10 Update Issues for Latest Upgrades

Windows Update is a vital element on Windows 10. This critical component helps in downloading and installing quality updates. Feature updates help improve overall performance, incorporate new features, and cover security issues. However, sometimes you may face problems during various operations.

However, you do not need to mull over it for long. Thankfully, if you come across an issue or an error, you can use various troubleshooting steps to fix the problems in Windows 10.

Monitor Automatic Updates and Schedule Reboot Timings

You don’t have the option to manage the automatic updates on Windows 10, but you can always monitor these updates. You can also control the reboot timings of your machine after all the updates are installed. This action ensures that these updates do not affect your work and cause inconvenience. 

Here’s how you can do it:

Step 1: Go to Settings and click Update & Security options.

Step 2: Select the Windows Update tab on the left-hand side at the top. Then, select Change Active Hours.

Step 3: A window called Active Hours will come up that allows you to set the reboot timings of your machine (not the installation of the update). Choose your preferred times, and click Save.

Step 4: You also have the option of customized settings in case of a pre-scheduled update. Just select Restart Options from the main Windows Update settings page to choose a custom restart time.

Step 5: You can halt system upgrades briefly for up to seven days. However, you will have to see different settings for essential updates like security.

You can select Advanced Options on the main Windows Update page to postpone the upgrades. You can choose the number of days from the drop-down menu.

You can make other adjustments to apply the updates in various ways in this menu, including the manual or automatic options. You even have the option to pause them completely.

Run the Windows Update troubleshooter

Microsoft created the Windows Update troubleshooter because the company is aware that sometimes there can be unwanted issues like the infamous Windows 10 May 2019 Update. This tool will run through your primary operating system specifications and search for any apparent problems that may be posing problems for Windows Update’s functionality. If possible, the troubleshooter can also fix them automatically. If nothing else, it will make you aware of what the problem is.

You can download the troubleshooter from Microsoft’s support page. Click Download Troubleshooter for Windows 10, and the tool will manage the rest. You may have to permit administrator privileges so that the tool can perform an in-depth check. You do not need to do anything else beyond that. It is best if you try it early on if you are facing update issues.

The troubleshooter will not solve every problem, but it’s the right solution. Even if it can’t fix the issues, you can still get useful information.

Check Your Installation Error Code

If your general update or featured update fails or poses problems, you will often get an installation error code. Usually, you can’t learn much from these codes directly, but they do have much information. You can consult online from Microsoft’s guide.

It would help if you remembered that this guide is designed specifically for Windows 10. It also works with recent versions like the Windows 10 May 2019 Update. Error codes may not translate in the same way in other versions of Windows.

Quick Fixes

If everything else fails, you can apply the tried and tested tips and tricks that have been solving update errors since the update was first designed. Here are a few options that you can try.

Reboot your computer

Surprisingly, this works quite well. When you experience an update error, reboot your computer and try installing the updates again. You may have to repeat the process if the Windows haven’t been updated for a certain period.

Clean the Disk

You should have at least 10GB of free space for updates installation. Perform a disk cleanup check to ensure there’s enough disk space. Apart from the system files, you can remove everything else.

Check System for Malware

Perform a check for malware as it can make your system insecure by messing with core system files or turning off Windows services. Install powerful antivirus software to protect your system from any malware.

Contact Microsoft support

If you have performed all actions and still the problem persists, then get in touch with the Microsoft support team for further assistance.

Which Astonishing Benefits You Can Get from The Audio Equipment Hire

If you have a plan to arrange a wide event then you need an outstanding audio system. There is a need for tools that inspire the attendees of the event. You might consider buying first to fulfil this purpose. But each audio equipment is capable of costing you a thousand dollars. The equipment might be inspiring but the cost can bring your event to the verge of bankruptcy. Because when you get out of your budget the event management becomes extremely difficult. Also, the possibility of large events is once a year.

Let’s suppose you get twice in a year and the need for both is different. In that case, buying also doesn’t seem rational. If the kind of event is the same you can think about it. But the benefits which Audio Equipment Hire can provide buying can’t give you. You don’t have to wait any longer. We’re getting closer to realizing the advantages of renting equipment.

Advantages Of Renting Audio Equipment:

1.    Suitability For the Event:

You will need to spend some time looking for the exact need of the event. Once you identify your need you will search for a reliable source. After finding a reliable source you will test equipment beforehand to ensure its effective working. Consider how long this entire process takes. This is your event you can follow this process. But by finding a professional and reliable company you just need to provide them with the details of your event.

The rest will be taken care of by them. This step saves us a lot of time and allows us to concentrate on other aspects of the event. In large events, a simple convenience provides relief from a lot of stress. Because large events demand a lot from the event producers.

2.    Best Equipment Maintenance:

If you choose a reliable rental company, you must be certain that all gears will be up to date. The tools that rental companies possess are the source of earning a livelihood. So, a guarantee of reliable hardware is the biggest advantage for them. Due to the surety of the appropriate equipment, the danger of equipment failure becomes less.

3.    Ensure Working Inside Budget:

You have found an appropriate tool for your event. However, you must work within your financial constraints. So, in this matter, the Audio Equipment Hire works best for you. It provides audio equipment of exceptional quality that exceeds your expectations. There are maximum chances of finding state-of-the-art technology there. To move above the standards, you must have access to the best possible gears. By working with experts, you can get the knowledge of the best brand and equipment available in the market.

It is a remarkable chance for you to ask whatever you want. At that place, no one will hide any informative content from you. The details provided by their experts will be extremely beneficial for you.

4.    A Chance of Getting a Professional Setup:

The general setup of the media hardware is craftsmanship. But when it comes to setting hardware for the sound, the nature of sound can be influenced by the following factors:

  • Venue space
  • Walls quality
  • Size of the audience

They keep in mind all of these details for the maximum output. They are more knowledgeable about how to control these variables. These experts know how to manage each technical aspect that can negatively influence your event.

5.    Acts As A Risk Aversion Strategy:

You can’t overlook the risk of equipment failure even if you have given your 100%. You can trust technology it can deceive any time. Therefore, you need to arrange something to deal with it. This seems a big deal but when you hire a reliable rental company it won’t. Their knowledgeable technicians will not let you suffer from any kind of failure. They know everything about their equipment therefore resolving any glitch will be easy for them. Moreover, their technical team supports you until the end of the event. By this strategy, you can mitigate the risk of equipment failure.

6.    Satisfying Customer Relationship Strategy:

When you search for rental companies on the internet, you will find tons of them. However, finding the right one is difficult. Apart from equipment availability customers support is also important. Because the availability of the equipment is not everything. Its effective utilization is equally important. Due to any glitch, if you want to return any equipment, they should be there to provide immediate support. A rental company that provides poor customer support is of no use.

7.    Long Term Relation:

You may need to hold the same event in multiple locations. So, it is clear that there is no flexibility in changing the theme of the event. If you look for a different Audio Equipment Rental then you have to explain everything again and again. This would lead to wastage of time and can also cause a significant difference from the previous event. Because not everyone needs to understand your need in the same way. So, if you develop a long-term relationship with them, they can arrange your event everywhere as per your desire.

8.    Source Of Opinion in Other Aspects of Event:

Rental agencies get experience from being a part of different kinds of events. Due to which they understand even minor aspects of the event. If there is anything which is left, they can guide you about this. Because even a minor missing detail can lead to an event failure. Therefore, the presence of a knowledgeable person at your venue is nothing more than a blessing.

Concluding Comments:

Every event producer works hard for the success of his event. But the difference in success occurs only because of the strategy difference. Ems-Events can help you get a competitive edge over others. This is the game of better planning and the use of the best equipment. When you are better at both of them the chances of the event’s success will increase.

AI-driven Digital Covid Certificate

AI-driven Digital Covid Certificate Verification and Security Clearance

The coronavirus situation is worsening and global authorities are imposing several restrictions to stop further spreading. The basic and widely adopted precautionary measures are social distance and wearing masks at all times, but there are now increasing obligations particularly in the travel industry.

Airports around the world require negative Covid-19 test reports and the verification of these reports to prevent forgery. Initially, Coronavirus certificate verification was being carried out manually and took upto an hour, making it very frustrating for travelers. However, there are now solutions for covid certificate verification that make the process much more efficient.

The Need for Covid Certificate Verification

With different countries banning tourism and leisure travels, it has become quite tough for individuals working away from their home countries to manage their annual vacations and travel back to meet their loved ones. Not only airports, but every public place including offices, restaurants, schools, and universities require Coronavirus certificate verification.

In addition to causing a global catastrophe, the coronavirus pandemic has also caused mass digitization of business and education operations, which means manual testing and covid certificate verification cannot be employed anymore. Digital platforms and top-notch software used at airports provide convenience to customers and save their time. Considering these kinds of expectations from customers, digital vaccine certificate verification is the need of the hour.

The Risks Related to Covid Reports

As per the regular procedure that is primarily being implemented by airports, the passengers are asked to report a few hours earlier in order to get their covid test done. The only alternative to this process is getting the test done from laboratories authorized by the respective government. Both these processes are tiring and inconvenient for the travelers/customers because the covid certificate verification is manual.

In addition to this, there are the risks of fraudsters forging the test reports to fool the authorities and travel without having tested Covid negative. This ultimately results in the increased spreading of the virus. Digital covid certificate verification eliminates the hassle and prevents fake reports with the use of AI-based solutions.

Digital Covid certificate verification provides an automated solution to accurately determine whether the test reports and vaccination certificates are original. The illicit intentions of fraudsters lead them to creating fake reports by changing small details like the name, date, and the location of the test. Moreover, they often design accurate reports that are very tough to distinguish unless proper coronavirus certificate verification is done.

Digital Vaccine Certificate Verification

Using the incredible abilities of AI, digital vaccine certificate verification helps global authorities to create safe environments for traveling and public gatherings. It works using the same basic principles used in identity verification, and adds a few security checkpoints.

Document Verification

After installing the respective API’s for mobile or web platforms, the user has to upload the required documents through the provided portal. These documents include the government-issued identity cards or passports, through which the user’s identity can be verified. Numerous AI models and algorithms are used to detect forgery and alterations in the documents.

Biometric Face Verification

Alongside the document verification process, digital covid certificate verification also includes biometric face verification. The user is required to appear live and a selfie is taken to authenticate their identity by matching with the photo on the ID card. This procedure prevents attempts of identity theft and the subsequent unauthorized access by fraudsters.

Covid Certificate Verification

Once the individual’s identity is verified, the next step is to verify the Covid test report and the vaccination certificate. OCR (optical character recognition) technology helps in accurately extracting information from the embedded QR codes within the report/certificate.

The code contains information including the person’s name and the test date, and running the code through AI-based systems can help companies in determining forgery to filter out fake reports. As per government regulations, there are requirements of the validity of the report, meaning that it should not be older than a certain date. Also, the report or vaccination certificate must be from authorized laboratories.

Final Thoughts

To sum it up, the present situation of travel restrictions and requirements of Covid tests and vaccination certificates is critical. This is why AI-based digital Covid certificate verification is becoming essential. Digital covid certificate verification over manual verification saves time as well as human intervention. Factors like bias and favors are simply eliminated, and so is human error.

How to Resolve Laptop Heating Problem After Extended Use

The problem of overheating machines has been around for decades. Whether you are using a desktop or a laptop, prolonged use of your device can often make them overheated. Especially if you’re a laptop user, you can experience a system slowdown just because of this overheating problem. Many laptop manufacturers have introduced countless interesting accessories to make the laptop heating problem go away. However, the goal of achieving that has only become more difficult with the passage of time. 

We live in a world where everything electronic is getting smaller and smaller. What used to occupy the space of a room can now easily fit on the tip of your finger. And as components are getting smaller so is the fact that all of it must fit into a single space. Today, a single laptop contains all the powerful components bunched up together into a single device and it’s one of the reasons that when these individual components heat up, they heat the entire device including the hard drive, microprocessors, etc. 

Although laptops do come with built-in fans, these fans can only cool the gadgets to a limited extent. And because everything is tightly packed into a single location, overheating has become a common problem. 

Do you own a laptop and do you often encounter that your laptop is becoming overheated? 

Here’s what you can do to make your laptop heat less when it is used for an extended period. 

1) Don’t Place Your Laptop Device on a Cushion

Do you have a habit of working on your laptop by keeping it on a cushion? Well here’s what you need to do. You need to quit using a cushion as a table stands for your laptop. You can easily purchase a wooden platform from the market to keep your laptop on, but if you don’t want your laptops to heat up, then don’t use a cushion or any other soft fabric material. Fabric materials such as cushions are filled with cotton and fiber and when your laptop device gets heated, all the heat dissipated gets absorbed inside. 

As a result, the cushion gets heated and so does the laptop amplifying the heat. 

2) Don’t Put Anything on the Laptop Keyboard in Close-Lid Mode

We often care about the screens on our laptops and in order to ensure that the screen stays safe, we often place a piece of fabric to separate the screen from the keypads in the close-lid mode. This is not a good idea because by placing a piece of fabric in between the keypads and the screen, we increase the chance of heat being absorbed into the fabric and amplifying the overall heat of the laptop. Now we certainly don’t want to experience that, do we? So it’s best not to make that mistake. 

3) Don’t Put it on Stand-By Overnight, Shut Down Your Laptop

Many of us have a bad habit of putting our laptops in either sleep mode or stand-by when we are done with our daily tasks. This is not a good idea because even when we close the laptop, some processes are still running in the background which consumes resources. As a result, the components in the laptop keep working even when the laptop goes in idle mode. Now, the heat dissipation in this mode is fairly low but as I said, if you are someone who keeps the laptop on a piece of cushion or some another type of fabric then there’s a high chance that this heat dissipation gets absorbed by the other material. 

It’s best that you shut down your laptop overnight rather than putting the laptop in the sleep mode. 

4) Shut the Laptop Down Before You Place it in Your Bag

While traveling, we often don’t want to shut down our laptops because we think that we are commuting for a short period. But even if our commute is just an hour-long, we can shut down our laptops and place them in a bag rather than just stuffing the laptop into our backpack without shutting it down. As a result, it generates heat and this heat can often make the laptop malfunction even when it is safely tucked away. 

And lastly, make sure to clean the vents on your laptop. Mostly, the heat accumulates because of the dust build-up around the vent which makes it fairly difficult for the laptop to function at optimal efficiency. 

Because of this dust, the laptop easily gets heated. 

So there you go, here are all the things that I think are worth discussing related to why your laptops can easily get heated. Do you have a laptop that also heats up easily? It’s best that you keep it away from the fabric and properly shut it down when you’re not using it. Until next time, cheers. 

How to Claim Your Business Listings on Apple Maps?

For those of you who aren’t quite aware of what Apple Map is, it is the default maps option on iPhones. It operates and functions quite similarly to Google’s Map. Getting your business listed on Apple Maps is just as much importance to you as it is to get listed on Google’s Map because there are plenty of users on the Internet who are using Safari and most probably searching up the same service that you’re offering on an Apple powered smartphone. These gadgets can include iPhones, iPads, Mac products, and many other Apple powered gadgets which enables the user to utilize the map’s functionality. Getting listed on Apple Maps will also ensure that when a user will conduct a query on Siri, then it is highly likely that the agent will identify your business (if properly optimized) and indicate your customers to locate you. When it comes to business listing information, Apple uses plenty of sources including Factual and Foursquare to list down all the necessary business information. And if you are not available on Apple’s radar, there’s highly likely your business services aren’t picked up. Hence, it is very important that you ensure you’ve claimed your business listing on Apple’s product.  

If you want to make sure your business appears when people search it by name or category, here’s a step by step process explaining how you can list your business down on Apple Maps once & for all. 

Step # 1: Visit Apple’s Map Connect

Access the Apple Maps Connect and sign in with your Apple ID. Now update your business information. If you are not an Apple user or do not have an Apple ID, now might just be the time to get one. The process is pretty similar to that of Google My Business, where you claim businesses on the GMB. Similarly, when you’re using an Apple product, the Apple Maps Connect is your go-to place which serves as the portal to claim your business on Apple Maps. 

Step # 2: Search & Add Listings Information

To check whether you’ve been previously listed as a business in Apple Maps, search the name of your business and its current location into the search box. Let Apple Maps Connect explore if you’re already previously listed as a business. It will help you find out if you’re already listed on Apple or not. 

If there’s already a business listing created, then you click on claim the listing as your own. 

If it is not present, then click on “Add new place” and enter your business information. Your business information may include the name of your business, the status, the category, and whether you accept Apple Pay or not. By listing all of this information, your business will dynamically be ready to scale up. 

Step # 3: Update Correct Information

Another important factor that you need to pay attention to before claiming your business on Apple is to make sure that every bit of detail that you add to your Apple Maps Connect account is accurate. Apple Maps have a policy where it doesn’t collect reviews like Google My Business, but instead, it collects reviews about your listed business from places like Yelp, TripAdvisor, etc. When you are updating business information, make sure that you add the correct business name, the original address, the proper map location, your right contact details, the right business category, and so on. All of this information will help Apple Maps Connect to pull out your information from other listings, reviews, and social media platforms. 

Step # 4: Let Apple Maps Review You

Once you’re completely satisfied with the way your business listing has been updated and your information is getting displayed on the Apple Map, confirm the ownership and voila! You’re all ready to go. Let Apple Maps take a short review of what you’ve updated. It will verify and approve the listings. Once approved, users will now be able to identify and search your business through the mobile app.

And that’s just about all you need to do to get listed on Apple Maps. Sounds quite easy, doesn’t it? You can do it yourself too if you have access to an Apple smartphone right now. The only downside is that if you’re a multi-location brand, then the Apple Maps Connect method might not work out for you. This method is specifically designed for people running a single physical presence of a business location in a particular market. For adding a business with multiple locations in Apple Map, you will have to work it out with a local marketing company such as Branex who can help you create powerful listings. 

Thank you for reading the article. Until next time. 

Work From Home Business Ideas in 2020

The Best 6 Work From Home Business Ideas in 2020

If you’re looking to start a business from home, these are the 6 best Work From Home Business Ideas that will help you in starting your business from home in 2020.

Read More
Persona 5

A Persona 5 Fusion Guide for Beginners Interested to Play Persona 5

Have you played Persona 5 lately? If you’ve played the game then I am pretty sure you know the significance of building up your persona 5 fusions. They are the only thing that allows you to survive the game’s complex Palaces and extremely challenging Mementos. 

Creating Personas within the game is of utmost importance because it allows you to exploit your enemy’s weaknesses and also enable you to battle and survive some of the toughest enemies in-game. 

Now understanding every Persona can easily overwhelm you. And if you ever plan on delving into their Fusions, the whole thing just become overly complicated. So why not, skip the whole deal of learning and instead, get the best Personas as you go through the game! Here’s a guide to help you understand how you can get the most powerful Persona 5 personas and master their art of fusion in no time. 

So without further ado, let’s get started. 

Are you familiar with the Velvet Room? 

The fastest way to acquire new Personas is to beat down challenging enemies throughout the game. The more challenging the enemies, the more difficult it is to vanquish them and the rewards are better. 

However, do you know that you can also create new fusions and strengthen your existing ones by sacrificing the ones which you already own? Yup, there’s a place called the Velvet Room in the game.

You might feel a bit overwhelmed when you are creating different combinations, but the process of fusion is fairly simple. With the latest updates, you are now able to work your way back if you’re not satisfied with a particular combination. Try manual combinations until you find the best for your character. 

Fusing Personas is also where your Confidant social rank comes into play. The higher your rank in a given Arcana, the greater are the chances of earning better bonuses. It indicates that you have a fair chance to create Personas which are relatively going to be more powerful than any you’ll find in wild. 

And Velvet Room is the place where you can perform effective Persona fusions. 

Personas can also acquire abilities from their parents. Hence, you can get some balanced results. 

In case, you’re having trouble with identifying source Personas, you can eventually become capable of fusing others which are already in your possession. To do so, just go through the “Fusion by result” section within the Velvet Room. As you level up in the game, acquiring personas becomes fairly easy. 

You won’t actually have to kill higher difficulty level enemies, as you can simply stun them and acquire your desired Persona. If you can’t kill em, then at least you can farm your favorite personas from them. 

How Should One Create the Best Persona for his Character? 

It is without a doubt, the Sataneal is the strongest Persona in the game, but you can only unlock it if you’re playing the New Game+. However, if you hold a bit of patience and use a bit of your imagination, you can then easily create variants of your own Persona which are equally tough and powerful.

Earning a complete immunity in the Persona 5 game is near impossible. 

It may take some time and may require a lot of brainstorming but you will eventually get there. 

Are you out on the hunt? Here’s a bit of advice that you need to keep in mind. 

  • Start by taking up a Persona that has all the natural immunities and you can create them by fusing three or more different Personas; good examples are Yoshitsune, Kohyru, or Black Frost.
  • Find Personas with passive-skill based immunities that are inheritable. The best example I can come up with is Black Frost which has no resistance against Electric damage. 
  • Fuse the Personas which you’re going to utilize as part of your ingredients. For instance, to pass Absorb Electric from Barong to Black Frost you’ll have to Fuse Barong with Asterius to create Yatagarasu with the inherited ability, and then fuse Yatagarasu with Seth to make King Frost with the inherited ability, and then use King Frost in the final fusion.
  • Get the raw ingredients, and get started with the Advanced Fusion to complete masterpiece. 
  • In the wake of creating a Persona that can best survive the game, individuals often forget to focus on the offense and make Personas that are more defensive. You can spend some time in the lower reaches of Mementos in order to get your hands on Skill Cars that you can apply. 

So there you go, everything important that you need to keep in mind in order to build your Persona. Are you up for the challenge? Download the game and start playing! Let us know what you feel about it? 

Stop Eaves-Dropping Alexa; How To Stop Alexa From Listening In To Your Conversations?

While we can’t imagine our lives without digital voice assistants like Amazon’s Alexa, recent reports have raised concern that these household staples are not just unquestioning minions, ready to serve, they are listening more often than people realize. I mean after all, how else would they respond to the “Alexa” wake word in a heartbeat? This has got people asking how to stop Alexa from listening in on their conversations.

Not only content with eavesdropping, they are also recording snippets of conversations which may be reviewed by humans in order to gauge how well the systems fulfill commands. According to Bloomberg,

“The recordings are transcribed, annotated and then fed back into the software as part of an effort to eliminate gaps in Alexa’s understanding of human speech and help it better respond to commands.”

After the startling revelation, people are frenzied over their privacy and left to wonder how much they have given away to strangers. Let’s face it, advertisers already know our weaknesses and desires; how far until what we desire walks right up to our doorstep in a jiffy?

Wondering how to stop Alexa from listening into your conversations? Here are a few ways to take back control and make sure no-one in your household really listens to you; especially not workers at Amazon! Here’s how:

How to Stop Alexa from Listening?

Use The Mute Button

For people who think that the “mute” button on the Amazon Echo devices exists to lull us into a false sense of security, it’s not all that bad. If you still have doubts, the teardowns of the Amazon Echo Dot show reveal that no voltage passes through the mic circuitry when in the mute mode. This mute mode is legit to be sure. While Mics may not need batteries to work, they can at least not record when shut out of the rest of the Echo. If you don’t know where the mute button is, look for a circle with a line through it or a micro-phone icon.

When you are not actively using your Echo device, its prudent to keep it on mute. But there’s a catch to it: what use is Alexa if it can’t take impromptu across-the-room commands. Nevertheless, it keeps those hush-hush conversations privy. When on mute, a red line appears on the Show series screens or the LED ring shines red, so that you can be sure that Alexa is behaving.

Switch The Camera Slider

If you are using Amazon Echo devices with a screen, such as the Echo Show 5 or Echo Show smart displays, why not use a camera slider to obstruct the camera view with a layer of opaque plastic. You can still utter commands to Alexa but block the camera that enables voice chat through services like Skype, since it leaves a lot of users uncomfortable knowing that the camera (and in turn, an amused Amazon employee) could be spying on them.

Switch off the Drop-in feature

One of the most controversial features of the Amazon series is that it affords your household and your contacts the ability to just “Drop In” and start a conversation via two Echo devices, much like a phone call. This makes your Amazon devices act like a video and audio intercom. Someone in front of the Echo device in the living room can get through to someone in front of the show in the upstairs bedroom. Some experts have suggested that a connection, for instant a fellow Echo owner you have in your contact list, could listen in on your home conversations.

Here’s where the problem starts. You don’t necessarily need a phone call to connect the two devices when they can communicate with each other automatically. It’s not so much as Amazon workers listening into your conversations as your 7-year-old spying on you. To disable this feature, fire up the Alexa app on your phone, go to Settings>Device Settings. Tap on any device and tap Communication. Turn the toggle to off for Drop in.

Tweak Your Privacy Settings

“We take customer privacy seriously and continuously review our practices and procedures,” the Amazon spokeswoman wrote in an email Friday. “We’ll also be updating information we provide to customers to make our practices more clear.”

In the wake of the recent backlash about Amazon employees listening in to your Amazon interactions and requests to improve Amazon’s transcription and test out new features, Amazon is changing its settings in a new policy which took effect last Friday, so people can opt out of having their voice recordings reviewed by Amazon employees.

  • Fire up the Alexa App and tap the menu button
  • Go to settings and select “Alexa Account”, scroll to the bottom and tap on “Alexa Privacy.”
  • Under the blue banner that appears, scroll down to “Manage How Your Data Improves Alexa”.
  • Notice how the first three items have been set to ‘on’ by default. Toggle these (especially the ‘Use Messages to Improve Transcriptions’ and ‘Help Develop New Features’) to the OFF position.
  • Ignore the warning that says that “new features” may not work properly if you proceed to make your recorded commands slightly less accessible to Amazon.

Prune Your Call History

As a last resort, you can log into your history and wipe out all the conversations you had with Alexa, logged on your Echo. While it definitely doesn’t stop Alexa from listening to you or recording your conversations, it removes all previous records it had of doing so. To do so, go to Settings > Alexa Privacy > Review Voice History. You will be presented with a list of your most recent Echo interactions. Scroll to the Date Range box and select ‘All History’, then tap on the Delete All Recordings for All History link. This gets rids of every Amazon record on file. However, this may wreak havoc on the performance of Echo, or so the disclaimer says.

Amazon also allows deletion by voice, which lets you delete recordings simply by saying “Alexa, delete everything I said today,” or “Alexa, delete what I just said”.

How to use Google Assistant to Run your Smart Home For you?

Google Assistant is integrated into millions of smart devices, smartphones, and speakers across the world, and has become almost as close to our hearts as Alfred was to Bruce Wayne or Jarvis to Tony Stark – and for good reason.

The list of things Google Assistant can do will leave your jaw hanging open. The super-awesome voice assistant can do anything from booking your appointments, replying to your emails, answering your general knowledge questions, to ordering grocery for you. But what has truly gotten us hooked to this nifty assistant is its ability to control our smart homes like a butler, acting as a single voice-activated hub for your outdoor security camera, smart thermostat, connected lightbulbs, doorbell, and everything in between.

When we say it never ceases to surprise us, we are not exaggerating. I just heard five minutes ago that if your TV is hooked up to a Dish Hopper receiver, your Google Assistant can now display the weather, your pictures, and what not with a voice command. Just this Wednesday, Dish rolled out a software update that added Google Assistant to its existing voice remotes. You can now control your TV by talking into a Google-branded voice remote. Push a button to talk to the remote to activate your smart home and ask your Tv the same questions that you would have asked a Google Assistant-equipped phone, smart display or smart speakers.

Regardless of whether you run the Google Assistant app on your Android TV, a Google Home Speaker, or your smartphone. You don’t have to have the brains of Ironman to command your connected home devices; not when you have Google Assistant at your beck and call. However, if you are still wondering how to use the Google Assistant app on your smartphone, our comprehensive guide will turn you into a smart home pro.

Where can I find Google Assistant?

A lot of people are under the misconception that Google Assistant is only available on phone, smart displays like Google Next Hub Max, the Google Home Hub, or on the extensive list of Google Home speakers, such as Google Home Max or the Google Home Mini. In addition, Google Assistant has also been integrated with a plethora of third-party devices. While it makes more sense to use a Google Assistant on your smartphones or speakers, any of these devices can be used to control your smart home., if you know how. Though you might not want to have to haul your body over to your car parked outside everytime you want to turn up the heat in the house.

How to set up Google Assistant devices?

However, only your tablet or phone will be able to connect your home devices with Google Assistant. Fire up the Google Assistant app on your device, tap the menu button and choose Settings. Next, tap “Home control” near the top.

On the page that pops up, add the ‘+’ icon, and choose which device account you want to link, such as Nest or Philips Hue. Depending on which option you choose, you will be directed to log into your smart device’s account. If you’ve already done so via Chrome on your phone, Google will ask for permission to connect to your gadget’s account.

After you have connected your smart home account, you will be presented with the complete list of available devices. 

Complete the setup process by following all subsequent steps. Once completed, you can set nicknames for your devices to help you identify each later on. This helps when you want to say, “Dim the lights in the bedroom” or “play some music in the kitchen”.  You can even assign devices to different rooms in your house, especially when you have a lot of different smart devices.  

Once the setup is complete, start asking Google Assistant to do things like “play me some soothing music”, “Turn up the thermostat”, or “Turn off the lights.” Ask your Google Assistant smart display or TV to “display the livestream of your security camera’s view”, “read you your favorite audiobook”, or play a particular video online.

A lot of brands have started working with Google Assistant, such as the latest Neato robot vacuums or the Philips Hue lightbulbs, not to mention products from Google-owned company Nest, such as Nest Cam IQ or the next-generation Nest Smart Thermostat-E.

How to Disconnect devices from your Google Assistant?

If you no longer want Google Assistant to control your smart devices, you can simply disconnect your account. Open the Google Homepage, tap the device>Settings> Remove device, and tap unlink.

How To Remove Suggested URLs From Google Chrome And Keep Your Browsing History Private

Chrome comes equipped with a repository of functions, all intent on making our lives easier; even the seemingly annoying autosuggestion of URLs in the Omnibox – the dual-purpose search and address bar – was intended to save you from typing out a full address.  For instance, if you are looking to visit TechwireHub.com, you start typing t, e, c, and chrome will automatically suggest Techwirehub.com. While it can be a real time-saver in a lot of instances, like when you are revisiting a site with a long address that you had previously overlooked to bookmark. However, it can be a real pain in the neck most of the time.

We have all visited sites we would prefer not to have appear in our list of suggestions, perhaps it’s a site you didn’t like, or visited by accident. The list of suggested URLs can reveal your search history to someone watching over your neck or someone you share a computer with. If you are concerned about your privacy, you wouldn’t want other people to see which sites you have visited.  If any of those possibilities are making you sweat, here’s how you can prevent this from happening.

How To Remove A Single URL From Chrome Autofill?

If it’s a matter of just a single URL, follow the simple step-by-step instructions below to remove the suggestion from ever appearing again:

  • Fire up the Chrome app.
  • Type out the URL until the entry you want to erase appears.
  • Use the Down arrow key to highlight the entry.
  • Press Shift + Delete.
  • This will eliminate the URL from the autofill suggestions.

Delete URL Suggestions Manually

However, when you are looking to delete multiple suggestions from the same website, things get a bit complex. You can’t possibly hope to delete every one of them individually, unless you have all the time and patience in the world. Bad news: this labor-intensive task only works temporarily. In no time, Google will fill up its treasure-trove of suggestions again.

The fastest and easiest way is to wipe your browsing history to get rid of the URL suggestions permanently. Open the Settings menu, choose ‘More tools’, then ‘Clear browsing data’ to delete your entire browsing history. Alternatively, you can use the keyboard shortcut Ctrl+Shift+Delete to open the same page, and check the box titled ‘Browsing history’ only. You can even specify the period within which your history should be erased and click on the ‘clear data’ button. However, this will still retain sites that are stored in your bookmarks. For that, right- click on those sites in the bookmarks menu and hit ‘delete’.

Delete URL Suggestions With A Browser Extension

If you frequently need to clear out your URL suggestions, why not download an extension that makes things a tad bit easier for you? For instance, the Click&Clean browser extension makes it far easier to delete saved URLs than navigating through the endless sea of Chrome’s settings.

Install the extension, click on the icon in your browser toolbar, navigate to ‘Clear private data’ and click the settings icon. In the Chrome section, click the trash can icon next to any data type that you wish to remove. Check the boxes pertaining to anything you would like to be able to delete from your browsing history and select the ‘Run cleaner’ button to remove them easily and in a hassle-free manner.

You can leverage the ‘Obliterate’ drop-down menu to customize the time frame for deletion as well. Once you have tailored the tool to your preference, in future, all you have to do is to click the Click&Clean button in the Chrome toolbar and select ‘Clear private data’ to get rid of everything that you have specified before; that too, in a single click.

Block someone on twitch

How to Block an Annoying Member on Twitch Permanently?

I was having a discussion with a friend of mine Klaus and he loves to play computer games. I never ever give it a proper thought as per why he’s so deeply obsessed with gaming until I learned about the Twitch. And boy oh boy, I must say if you have a knack for gaming, you can make some serious bucks using Twitch

It is a streaming platform for hardcore computer gamers. On Twitch, gamers from around the world stream their online gaming videos on their channels and individuals like you and I, we watch them play and learn a whole lot of things from them. Is there a game where you struggle to cross a stage or complete a boss fight, Twitch can help you learn how to conquer it. 

Anyways, Klaus came to me with a query. He talked about this mischevious friend who just doesn’t know where to draw the line. This friend of his is not only stalking him day in and day out but he also somehow started following his Twitch stream. In fact, he even asked me on my stream chat that why has he blocked him. 

Poor guy! Something had to be done. And I suggested him to permanently block him across all social channels. I also realized that you can even block a person on Twitch and that compelled me to cover this article. How many of you don’t want negative back talkers or politicking individuals poking their snub noses in your Twitch streaming? Here’s how you can block them for good. 

How to Block Someone on Twitch?

Step # 1: Open Up Twitch on Your Web Browser

To block a person on the Twitch channel, you will have to visit the official Twitch website. 

Open your web browser and enter www.twitch.tv into your browser’s address bar. Now, hit Enter

You can even use a mobile device such as an iPhone or Android to log into your Twitch channel. 

How to Block Someone on Twitch? Step #1

Step # 2: Now Open the Channel You Want to Watch

Now simply navigate to the right channel and find the channel which you want to watch

For example, right now I wanted to watch Zombie LTM so I will access his channel from my list. 

Channels usually appear on your home screen or you can search them up in the Browse option. 

How to Block Someone on Twitch - Step # 2

Step # 3: Find the Chat Panel on the Right Side of the Screen

Once, you visit the stream channel, you wil find the chat panel located on the right side of the screen. It is usually running on the right-hand side of the Twitch channel of the page. 

How to Block Someone on Twitch - Step # 3

Now click a username in the Live Chat section that you wish to block, and click their username in the stream chat. It will open up their profile cards in a small pop-up. Select the three dots located on the bottom right and it will open up two options; one for blocking the user while the other for reporting him/her. Simply, choose block [Name] and the user will get blocked from your channel. 

If you are using a mobile app, then you just have to tap on the username which will bring all the user options in the mobile app. Find the Block option from there and tap on it to block the user. 

You will be shown a screen saying, 

how to block someone on twitch

Hit the RED BLOCK button. 

And there you go, you have permanently blocked this person from viewing any of your activity. 

If you are looking for a guide to remove sponsored ads on yahoo than check this out.

OK, Google, that would be all! How to Turn Off Google Assistant?

Ok, nobody’s being thankless here. If this entire topic is making you uneasy like when Diego shut down ‘mom’ in the Umbrella academy, leaving us all floating in mixed emotions, hear me out. While at times, Google Assistant can be a really helpful tool to help you organize your life and navigate your gadgets, it can get a little on our nerves when it dispenses unsolicitous opinions, so it’s good to know How to turn off Google Assistant for these situations.

For me personally, the most exasperating moment is when Google Assistant wakes up without me having asked for it. It appears almost every time I unlock my phone, which I do a lot in a day. 99% of the time, I really don’t need it, and have to swipe it away before I can perform the actions I want. Perhaps I have accidentally pressed the Start button on my smartphone which activates the Google Assistant.

As soon as it is activated, it captures your voice, comprehends the instruction and comply. The worst part is when your smartphone is in your pocket and yet you somehow activate Google Assistant by accident without even being aware of it. Let’s say, you are in the middle of a serious conversation, you happen to have inadvertently activated your voice-activated companion, your device might pick up a fragment of something you have said, and suddenly answer you!

Trust me shouting out “get lost, Google”, “you suck, Google”, never works, I have tried. This is because the option to disable Assistant is hidden in layers of menus. After many annoying and embarrassing episodes, I have put together this guide to help you turn off Google Assistant!

How Do I turn off Google Assistant?

First things first, you need to fire up your Google app. You will have no trouble locating it on the home page or in your app drawer, since all Android phones will come with this pre-installed. Look for this app icon.

Once you have opened the app, tap on the “More” button in the bottom right corner, which has three horizontal dots above it.

Search for “settings” in this menu somewhere at the bottom of the list.

Once opened, select ‘Google Assistant’ in the next menu.

Select ‘Assistant’ in the Google Assistant options menu. scroll down to the bottom to see the list of all devices it is used on. Select the ‘Phone’ option in the list to control how the app will be used in your phone.

Look at the top Toggle labelled ‘Google Assistant’? tap on it to deactivate it for your whole device.

tap on the Toggle to turn off Google Assistant on your device.

Phew, now that you have succeeded in subduing your over-helpful friend, your can rest easy knowing that your phone won’t be eaves dropping on your conversations. Now when you actually want to summon the Google Assistant, either by squeezing your phone, or pressing down on the power button, a search bar will appear to let you type in your request manually! Much less invasive!

How to Delete Your Activity on Google Manually

Google has become an integral part of our lives. Whether we are checking in at a hotel, booking a ride, waiting in line or casually strolling the park, Google allows us to search up everything that we want to learn using its incredible Search Engine. 

However, when you use Google sites to search up information, may it be an app or other Google service, it automatically stores some of your information in its Google Account. This information is commonly stored to deliver you more personalized experiences. 

And if you’re not savvy with that, then still no frets. You can easily remove that information from your Google Account by following these few simple and easy steps. Here’s how you can remove stored information from your Google database in just a few simple and easy steps. 

How to Delete Your Activity on Google Manually

Do you want to delete your Google activity permanently from Google’s database? You can either choose to wipe out all of the activity information at once or you can choose items individually. 

If you want to delete all of your activity at once, all you have to do is follow these simple steps. 

  • On your computer, go to your Google Account.
  • On the top, left navigation panel, click Data & personalization.
  • Under “Activity and timeline,” click My Activity.
  • At the top right of the page, click More.
  • Click Delete activity by.
  • Below “Delete by date,” click the Down arrow and select All time.
  • Click Delete.

If you want to delete a single individual activity item, such as a site you visited on Google, 

  • On your computer, go to your Google Account.
  • On the top, left navigation panel, click Data & personalization.
  • Under “Activity and timeline,” click My Activity.
  • Find the item you want to delete. You can find an item a few different ways, including:
    • Browse by topic or product. At the top, under “Delete by topic or product,” click Try it.
    • Search by keyword or date.
  • On the item, you want to delete, click More.
  • Click Delete.

Delete Your Activity from other Places

Whatever tasks you perform using your Google Account, it is not necessary that it only has to stay in your My Activity folder. For instance, if your Location History is turned on, your movement information gets stored in your Maps Timeline. You can easily delete all that information saved in those places. 

And that’s all folks! Guess y’all know how to clear your activity information from Google’s database.

How to Block Ads on Twitch without Using an Ad Blocker?

Who likes Ads? If you ask me it’s the last thing I want to see when I am watching a stream.

They say ads are a great source of earning for businesses. However, truth be told, they aren’t. Most ads are for baby boomers. Take a look at Facebook, the only social platform baby boomers use.

Many people have claimed on Reddit that they have stopped watching videos on social media platforms just because of these ads appearing everywhere in every video that they watch online.

Twitch is one of the largest online game streaming app which is massively used by online players from around the world. It helps educate individuals on how to play various games of their likings.

Not only is it a great platform for online gaming, but players streaming on Twitch are able to create a loyal fan following by offering free giveaways and amazing discount offers. They say advertising is an interesting way for streamers to earn. Actually, streamers have no particular control for ads on Twitch.

Streamers Do Not Own the Right to Decide What is Shown on Twitch

When it comes to Twitch, streamers have no control over what is shown to the consumers on their streaming channels. Previously, it could’ve been anything; from crappy game ads to movies to political candidates asking users to vote for them. It got out of hands and a real annoyance for daily viewers.

Things really turned an odd way for Twitch streamers when they started seeing ads for on-site events and other Twitch creators on the platform. The official team got some serious backlash for this.

As a result, during the month of January, Twitch released an announcement stating that they will no longer run advertisements promoting on-site events or other streamers across the platform.

Despite all the widespread criticism faced by the streamers who were part of the advertising campaign, some of them came out and expressed how such campaigns benefit the whole industry.

Here is Pokimane, one of the streamers expressing her happiness on the exposure brought by the ad.

However, at the same time, many creators feared that such advertising campaigns powered by Twitch can really draw the viewers away from their channels. Here’s what Sam “Strippin” Thorne has to say:

That sounds a bit harsh but what incentive do streamers have to run ads when Twitch tells their audience to go watch someone else?

Also, Streamers Make Almost Nothing with Ads

Now, I am not speaking my mind out here, but while I was doing my research, I came to this website called the PoopButt101. I learned that most Twitch streamers almost make too little by running ads.

Here is a snippet from the user’s Live Views for the month of February.

As you can see, the user easily falls into the 10k category.

Here is how much the user is earning through running different campaigns on the Twitch.

Do you see how less the user makes from running ads on his Twitch channel? Only $7.12. That’s a relatively bad bargain a user has got himself into, because every time a visitor visits, he/she is forced to watch an ad worth 30 seconds. Surprisingly, an average individual takes only 5 seconds to switch.

Another great way how Twitch users make a good viewership is by asking people for donations. The more the people donate, the more they are able to contribute to a cause and do something amazing.

Now when someone visits a streaming video where you are asking for let’s say, a $5 donation. The first thing that comes to their mind is, “Oh, this guy is already earning money from running ads.”

In fact, streamers nowadays earn through donations and ads are simply discouraging that option.

How Should One Remove Twitch Ads Permanently?

We have now concluded that Ads can be a real nuisance for both, the viewers as well as streamers.

Previously, people were considering good ad blockers to stop ads from trashing their experience. But, recently, Twitch has worked up its algorithm which can easily evade the bypasses of ad blockers.

It is using the circumvention software to subvert ad blockers.

If you want to stop ads from appearing in your Twitch videos, here’s what y’all need to do.

Method # 1

If you are using Google Chrome as a browser, make sure to visit chrome://flags/#network-service and then disable it. This will stop ads from appearing on your Twitch stream constantly troubling you.

Method # 2

Another way to avoid ads from appearing on your Twitch channel is to switch your Twitch desktop version to a mobile version. You can add an extension called the User-Agent switcher to the browser.

You can easily find the extension for this app on your browser extension store.

If the official website doesn’t work, activate the browsec extension for a private IP address in Chrome.

Also, make sure to add ublock origin or umatrix extensions to your browser for ad blocking.

Do You Have Any Questions?

I hope this article was an informative read. Do you have any questions? Well, what are you waiting for! Go ahead and ask, we are more than willing to interact with you.

Participate with us on the actively growing TechWireHub community on Facebook.

How To Delete Google History Automatically?

Google has announced that you now can automatic schedule your browser history to be deleted automatically.

Read More
How to Activate Your iPhone without a SIM-Card

How to Activate Your iPhone without a SIM Card?

Do you have little ones at home? I am sure anyone sharing quarters with little spawns knows how difficult it is to keep our iPhone  away from sticky hands and prying eyes. After-all, we can’t just hand them a working device. At least, not one which comes with a SIM card. It makes me cringe thinking of all the dangers lurking in the depths of technology!

Do you know there is a way you can use an iPhone without the SIM card?

In fact, you don’t even need a stable Wifi connection to run it.

To explain to you the complete process of activating your iPhone without a SIM card, we will assume that you already have access to an unlocked iPhone which is not carrier specific. 

If you want to unlock an iPhone which is carrier specific, watch this amazing video instead: 

Method # 1: Unlock Your iPhone Using Someone Else’s SIM Card

One of the easiest and quickest ways of unlocking your iPhone is to use someone else’s SIM card. For that, you will need a friend who already owns a smartphone and is interested in sharing the SIM with you. Once you have unlocked the phone, you can use it on a WiFi network just like you can use an iPod/iPad. Here are a few things that you require to remove the SIM card from your iPhone.

  • Get access to a SIM removal tool
  • Find a nice friend who is willing to share his SIM card with you
  • A steady access to a powerful Wifi Network.

Now, let’s get down to business. Here’s how you can unlock your iPhone using someone else’s SIM card.

  • Remove the SIM card from your friend’s phone and insert it into the iPhone device you wish to unlock.
  • Upon starting the device, go through the usual configuration steps and log-in.
  • Now patiently wait for the iPhone to activate, once its done, remove the SIM and hand it back.
  • Now, you can access all the features of the iPhone apart from sending a text messages or making a call.
  • Don’t worry, the SIM will work just fine on your friends phone while you can communicate using different social platforms such as Skype, Facebook Messenger, WhatsApp, etc. 

Method # 2: Activate Your iPhone Using the iTunes Option

This particular method is specific for iPhones that are carrier specific and locked on a particular network. So, if you have such a phone in your possession, you can unlock this phone using the iTunes option. Even if you don’t have access to a stable Wifi, iTunes will work for you.

Here are the two prerequisites you will need:

  • An unlocked iPhone device
  • An accessible iTunes on computer

Here’s how you can unlock your iPhone using the iTunes method.

  • Download iTunes for free and then check if your iTune account is up to date.
  • Now connect your phone to your Computer & connect it to iTunes.
  • You will see an on-screen prompt, saying, “There is no SIM card installed in the iPhone you are attempting to activate.” It will indicate that the phone is locked on a specific carrier. Now, you have to find that specific carrier, but just for a moment to unlock your iPhone.
  • Once the prompt is resolved, your iTunes will guide you through a step by step process on how to activate your iPhone. Fill in all the important details and activate your phone.
  • Now, you can use your iPhone just like an iPod or an iPad.

Method # 3: JailBreak Your Phone

If every other method fails, you can make use of the jailbreak feature to unlock your iPhone. Once your device is jailbroken, the warranty of your phone becomes void. Jailbreaking an iPhone or an iPad requires you to go through an extremely long process to activate and unlock it.

We usually don’t recommend this method as it is unethical in practice. It can seriously damage the warranty and price of your phone and hence, this method is considered an unreliable one.

If you are interested to jailbreak your iPhone, here is an interesting video to guide you:

So here are all the methods you can employ to activate your iPhone if you don’t have a SIM card.

Do You Have Any Questions?

I hope this article was an informative read. Do you have any questions? Well, what are you waiting for! Go ahead and ask us questions, we are more than willing to interact with you.

Participate with us in the actively growing TechWireHub community on Facebook.

How to Stop Skype from Automatically Starting on Windows 10

Who doesn’t like to get social? Specially when there are so many interesting social apps all around. Among many such social apps, Skype is the most convenient for commercial & domestic use.

After all, from colleagues to friends and family, Skype keeps us all connected. We send messages to each other, make fun video calls, share files, and above all, see all those who are online.

However, with all the beeps and boops, Skype can be a real nuisance at times. Often, we aren’t even aware of whether we are logged into the platform or not and suddenly we start receiving calls & messages at the most unwarranted occasions, for example in the midst of important business meetings. 

Basically, this happens because by default, Skype logs a user in automatically every time their device powers on. The person then stays logged in the background until the device completely shuts down.

Skype is designed in such a way that it ensures your loved ones can always stay connected with you.

But that can seriously turn sour when you are busy! 

Do you know that you can stop Skype from auto-starting on your Windows? So, today, I will explain you how you can disable Skype in Windows 10 right at startup. The next time your system boots, it will not auto-start Skype. Instead, you will have to manually open it by double-clicking the Skype icon.

Method # 1: Log-Out from Your Skype Account Once You Are Done Using It

The fastest and most reliable way to stop Skype from auto-starting is to log-out from your Skype account permanently. What is your end goal? I am sure you want people to stop annoying you on Skype.

All you have to do is log-out from your Skype account once when you are done using it.

So, the next time you boot your system, Skype will auto-start but it will eventually fail to sign in.

Here’s how you can log-out from the Skype app in Windows 10.

Step # 1: Click on the the three dots located on the upper left corner of the screen.

Step # 2: Choose the option that says “Sign Out

Step # 3: Skype will automatically exit from the screen.

Normally, when you are using Skype and you are logged into the platform, there are two processes running in the background. You can check both of these processes working in the background in Task Manager. To access Task Manager, press CTRL + SHIFT + DEL and select Task Manager.

Both of these processes are SkypeHost.exe and SkypeApp.exe. So when you shutdown your Skype without logging out, SkypeHost.exe still keeps running in the background so you can still receive notifications from your Skype contacts. However, when you log out of Skype, both the processes gets killed. As a result, when you shutdown your Windows and restart your system, it doesn’t log you in.

Method # 2: Set Skype not to Automatically Start from the Settings

The other method isn’t complicated either and is an option that will permanently stop Skype from logging you back in on the Windows Start-Up. The step are as follows: 

  • Step # 1: Double click the Skype icon and start the Skype Desktop app on your computer.
  • Step # 2: Click on the three dots located at the upper left corner of the screen.
  • Step # 3: Go to the Settings option.
  • Step # 4: In the Settings option, go to General settings.
  • Step # 5: Flip the switch “OFF” ,  Automatically start Skype once and for all.

By selecting this option, you will permanently stop Skype from auto-starting. If you follow the first method, even though you will stay logged out, Skype will still run in the background on Windows 10. However, with the second option in place, Skype will not even start in the first place. In fact, you will have to double click the Skype icon and manually start Skype in order to use it. However, don’t forget that you will still be logged in Even though you have shutdown the program permanently.

Did You Find this Article Interesting?

I hope this article was an informative read. Do you have any questions? Well, what are you waiting for! Go ahead and shoot away; we are more than willing to interact with you.

Participate with us in the actively growing TechWireHub community on Facebook.